This article will help you integrate Yay! Forms with ActiveCampaign so you can connect your Yay! account, map form fields, automatically import contacts, and use form responses to trigger automations.
Integration steps
Follow the steps below to integrate Yay! Forms with ActiveCampaign:
Log in to your ActiveCampaign account using the link:
Search for "Yay" in ActiveCampaign's native app search and select Yay! Forms:

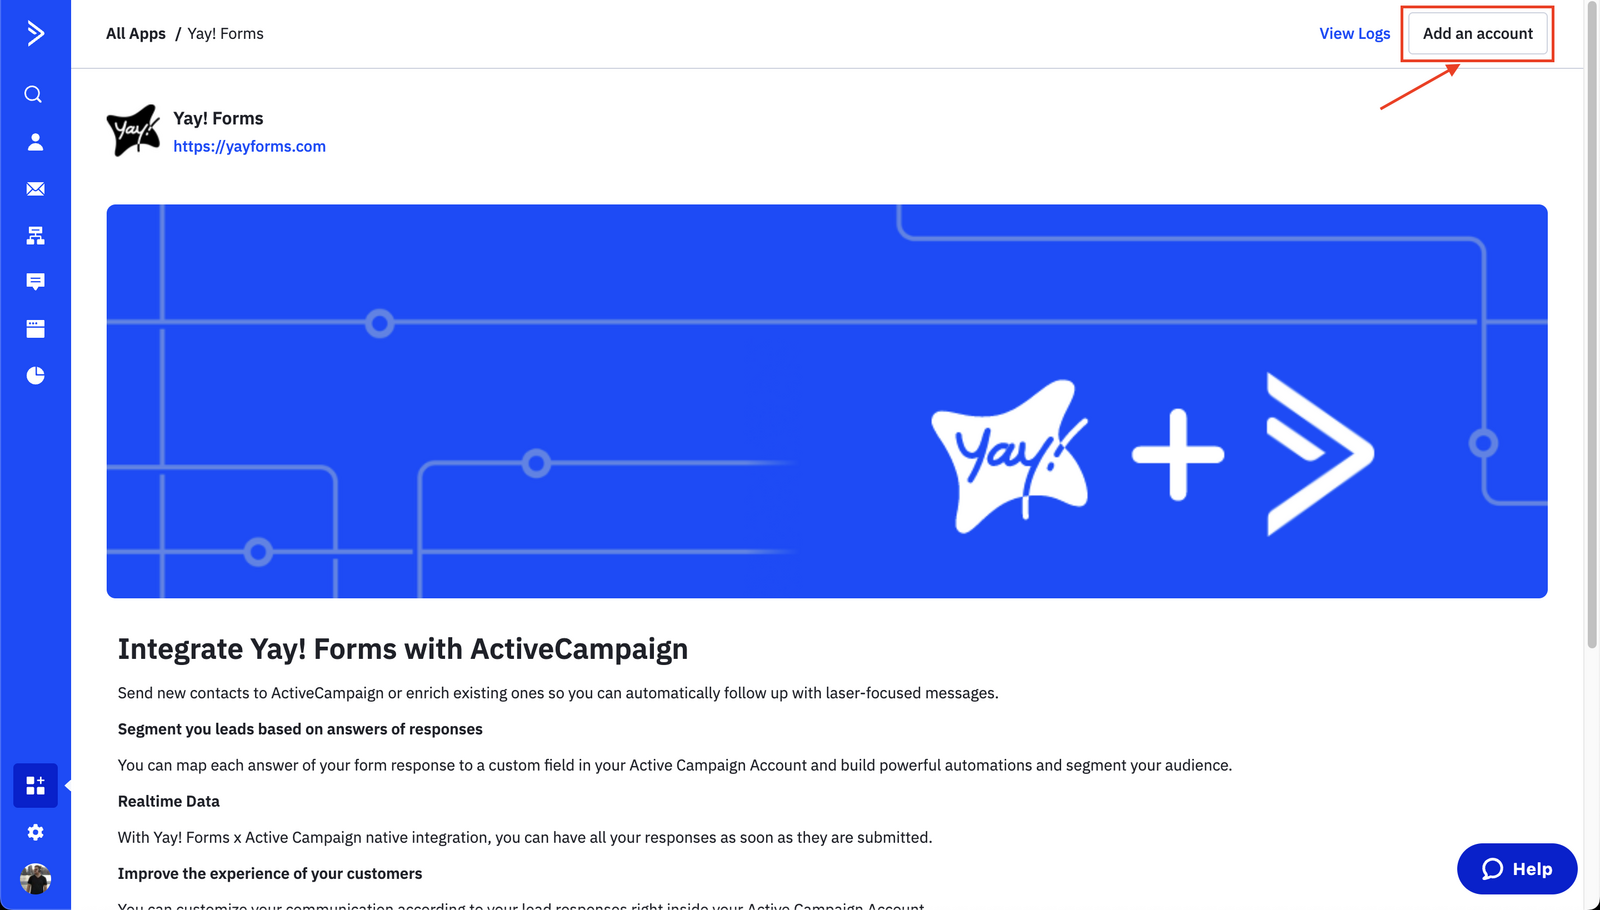
Click "Add an account" to connect to your Yay! Forms account.
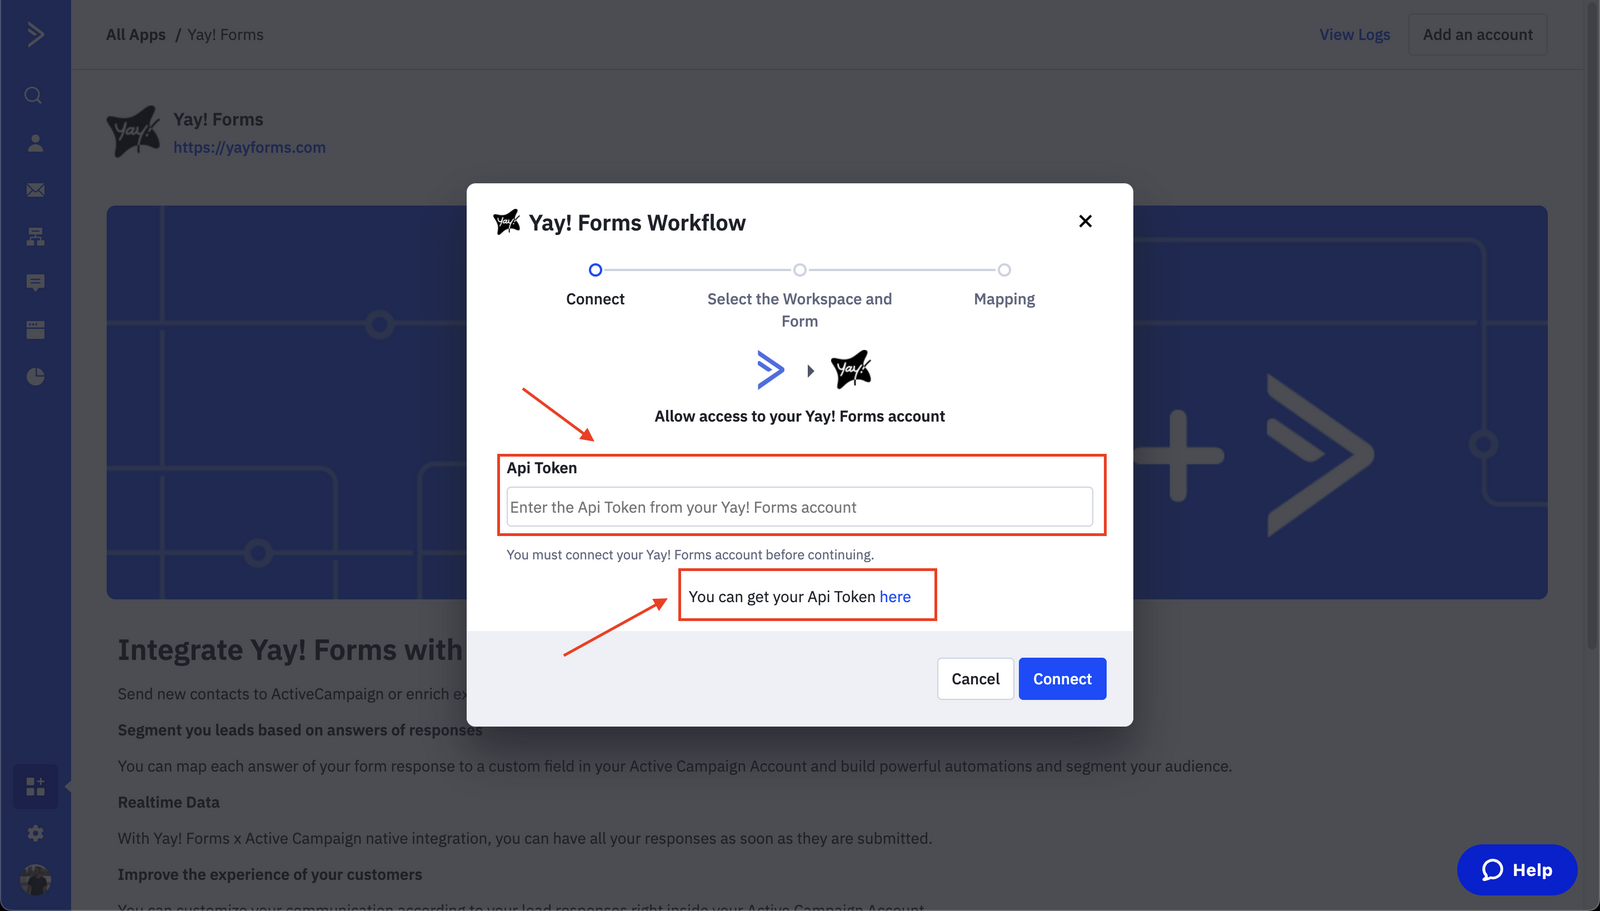
Enter your API Token in the field indicated below and click Connect.
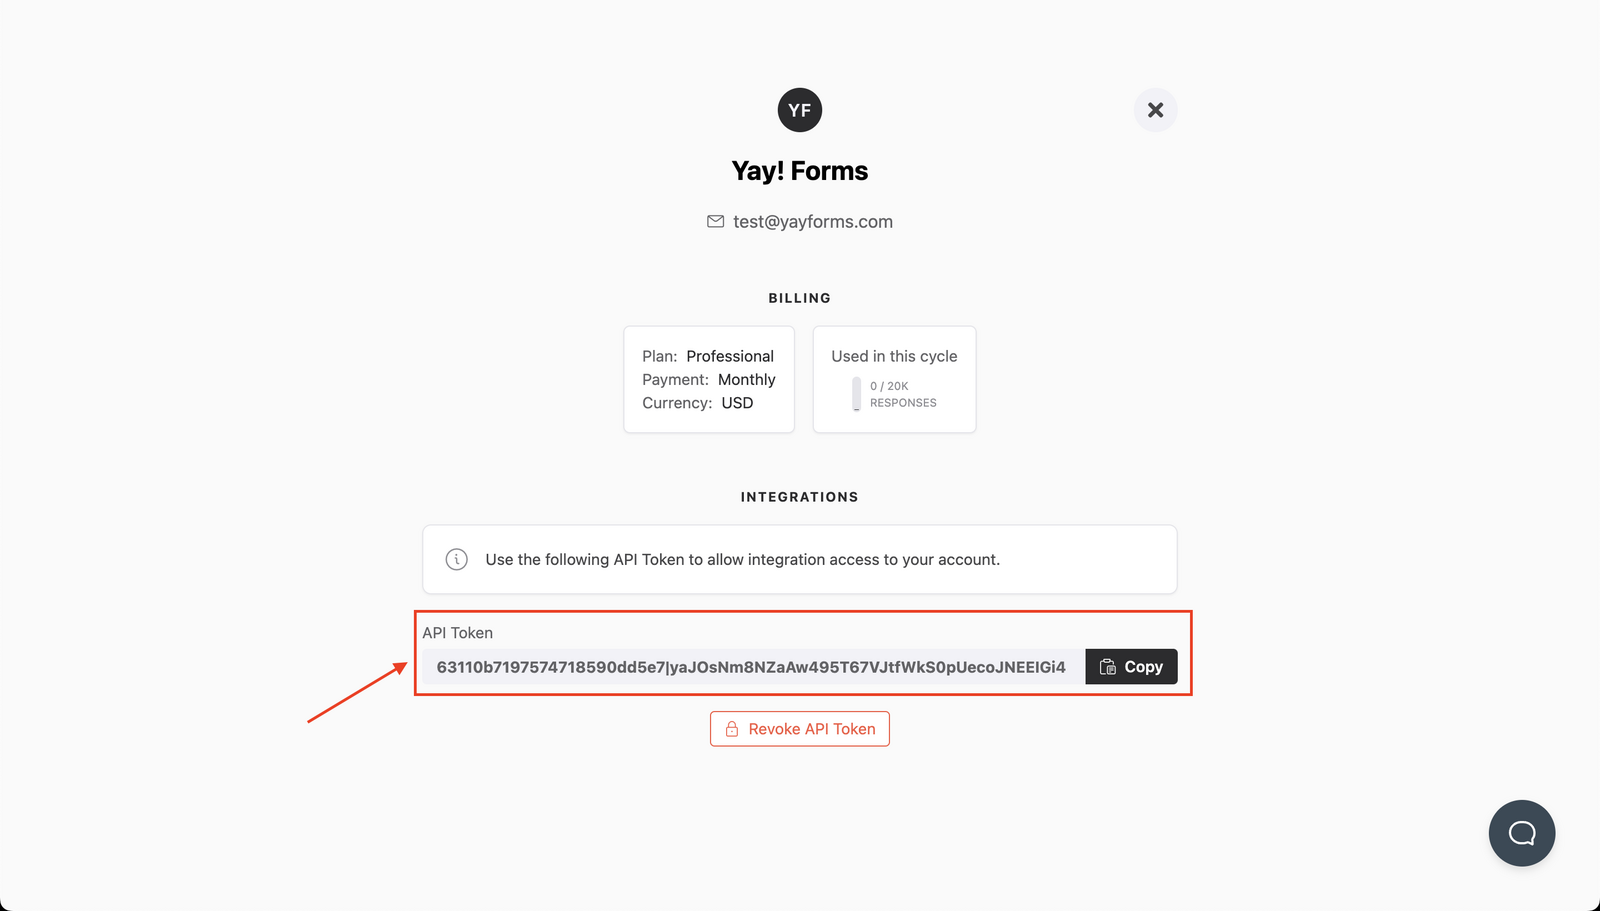
You can generate/get your API token key at https://app.yayforms.com/me, as shown in the image below:
Select Workspace and Form, as shown in the image below:

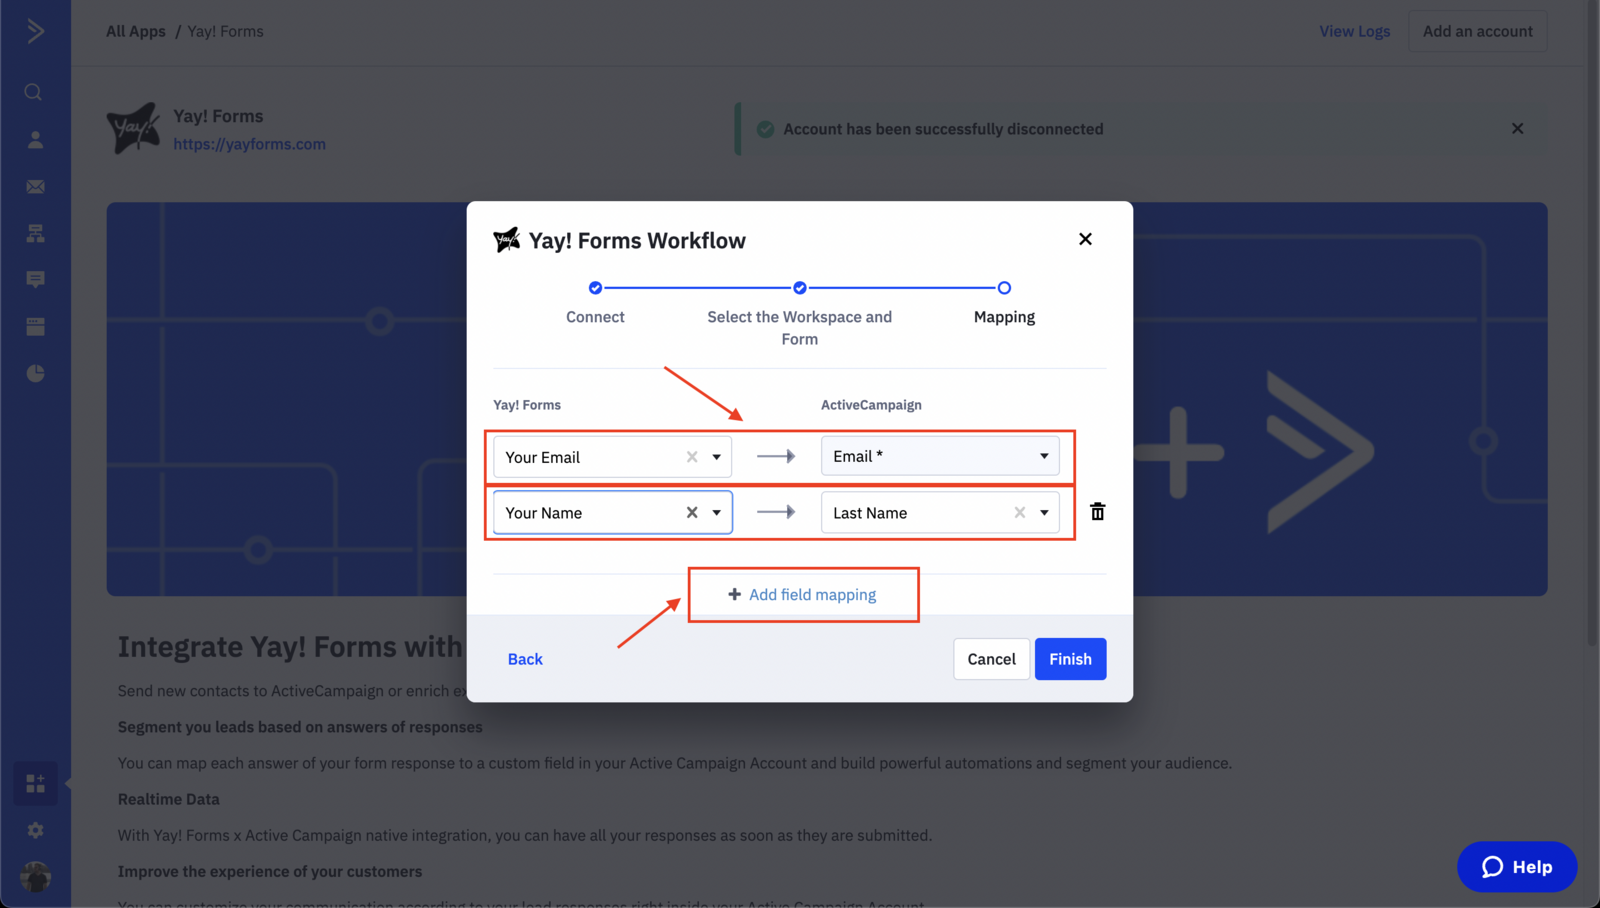
Map the fields between Yay! Forms (left) and ActiveCampaign (right), as shown in the image below. You can add as many fields as you want. After completing the mapping, click Finish.
After completing the setup above, you will see the onboarding screen, as shown below:
What happens after setup
Contacts will be imported automatically into ActiveCampaign with their respective tags and fields, as shown in the image below:

From now on, you can use form responses as a trigger for an automation in ActiveCampaign, as shown in the image below:

Managing the integration
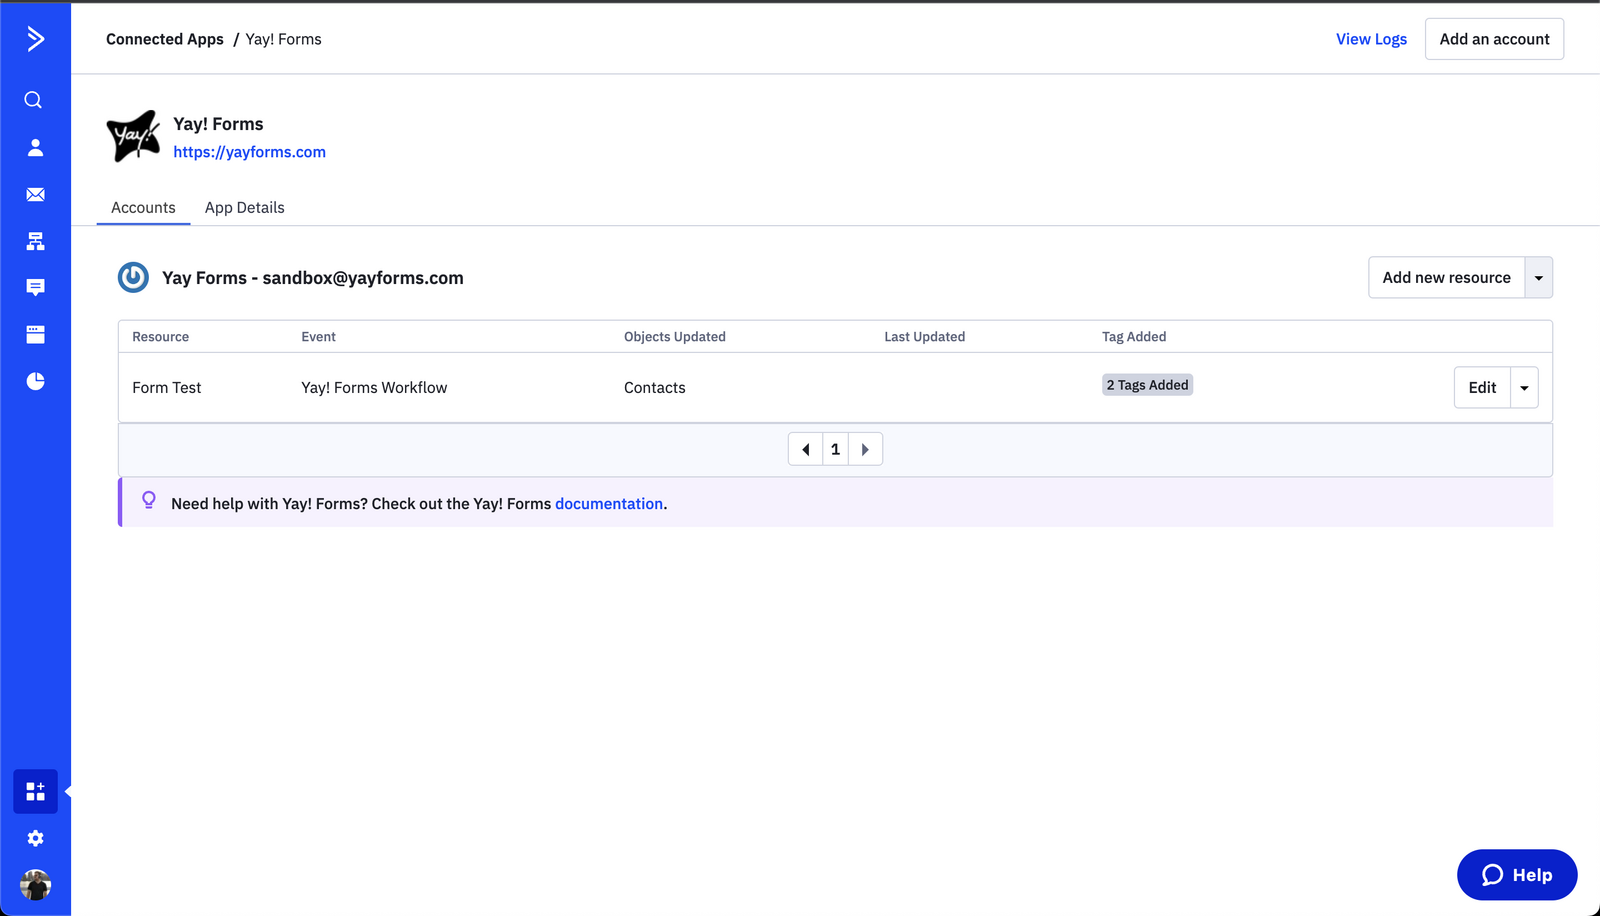
If you need to disconnect the account, integrate new forms, or view logs of submitted forms, just access it as indicated in the image below.

Support
We hope you enjoy the new integration :)
If you have any questions or suggestions, send an email to [email protected].
Conclusion
You now have a structured process for connecting Yay! Forms to ActiveCampaign, mapping fields, and enabling automatic contact import and automation triggers, along with knowing where to manage or disconnect the integration and how to reach support.