This article will help you connect your Yay! Forms form to ChatFunnel, configure the integration, map fields to create contacts, and optionally use tags, priorities, and conditional sending based on user responses.
Connect your Yay! Forms form to ChatFunnel
1. Access the form
Open the desired form and go to the Integrate tab. There, you will find the ChatFunnel integration. Click Configure to start setting up your ChatFunnel account.
2. Connect your ChatFunnel account
When you access the integration screen, you will need to connect your ChatFunnel account.
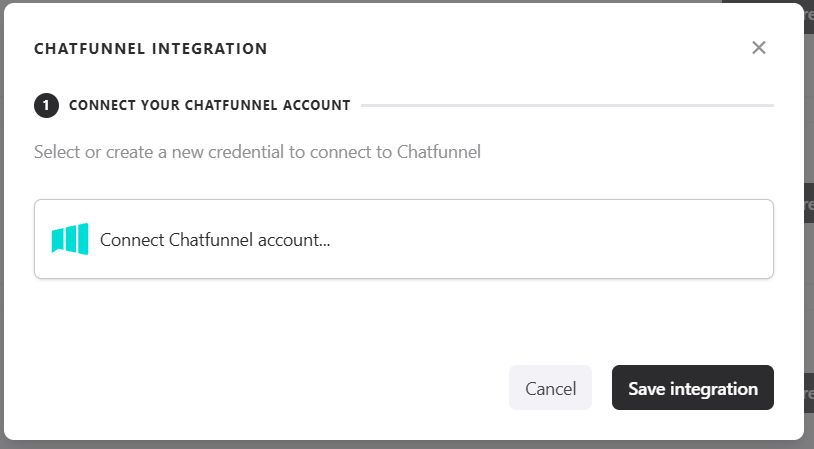
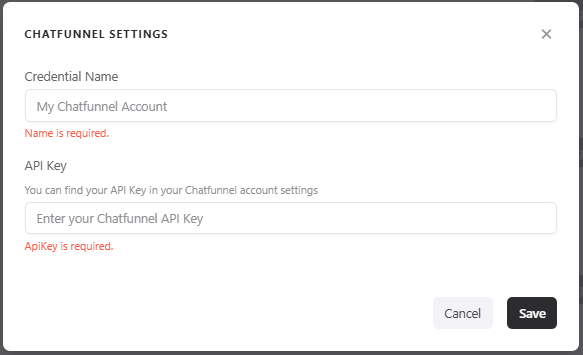
Click Connect to open a modal where you will need to enter the ChatFunnel API key.
To generate and obtain this API key, access ChatFunnel, go to Settings, and then to the API Keys tab. Then click Add API Key.
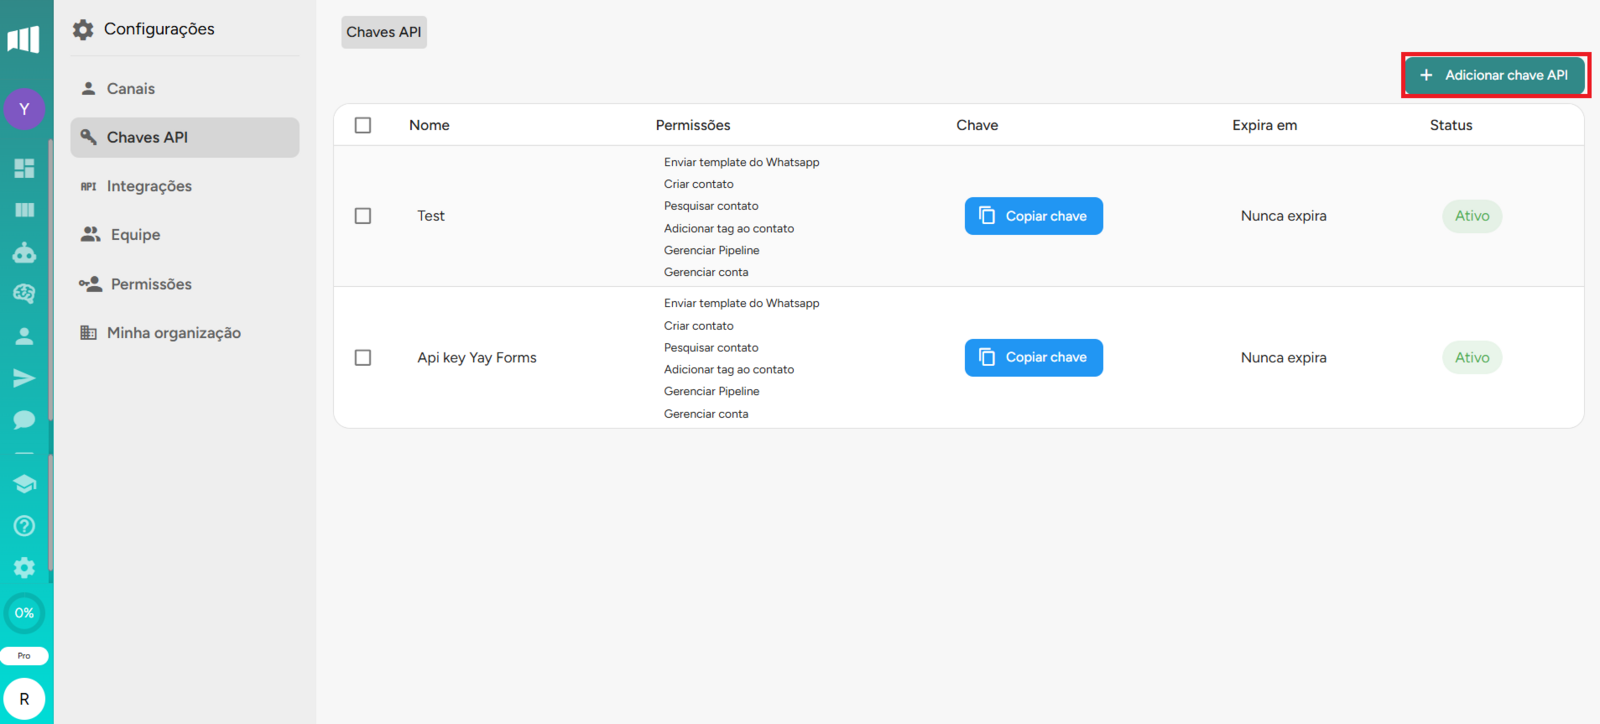
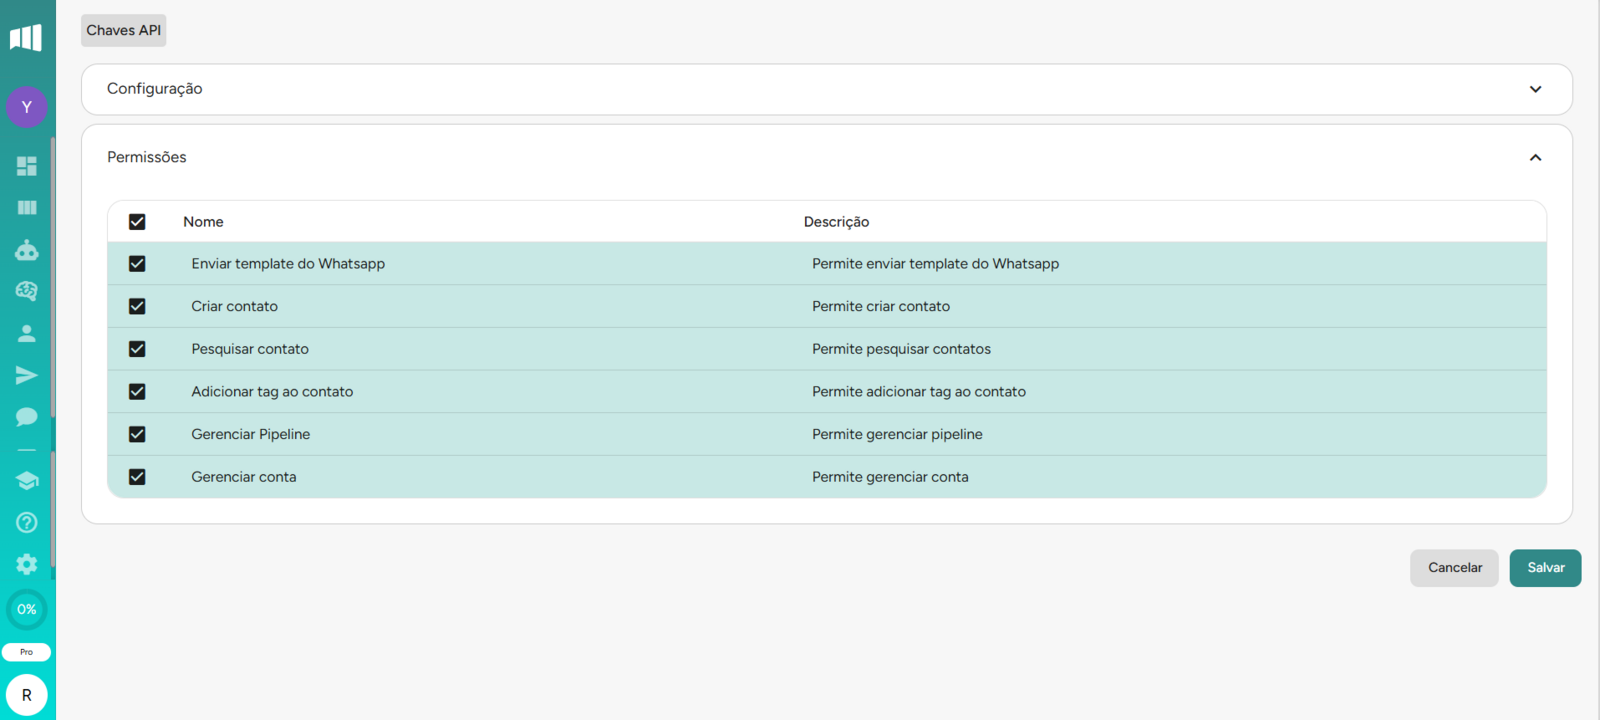
Right after that, we recommend that you define the desired permissions.
Done! Now just copy the API key and paste it into the Yay! Forms modal.
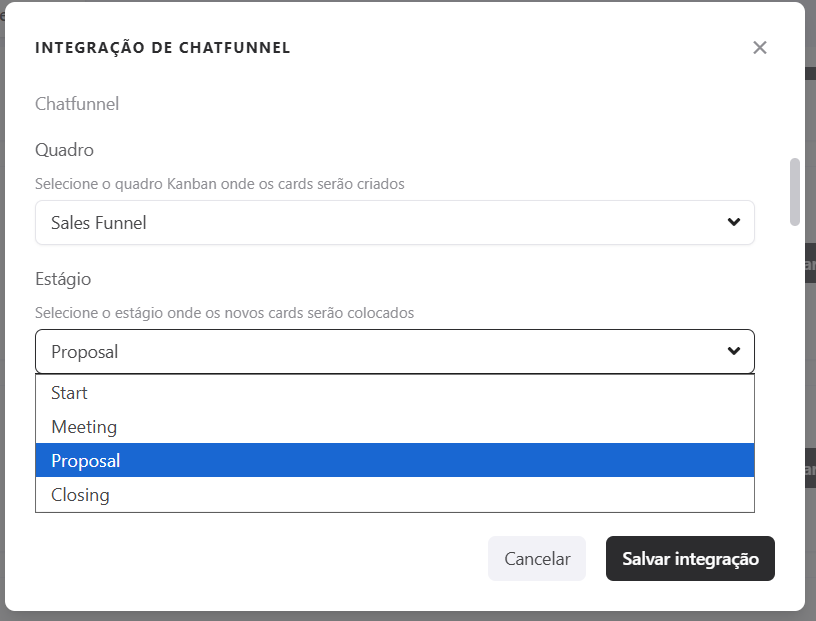
2.1 Select the board and stage
After that, select the board and the stage you want to send the form data to, as shown below:
Configure data mapping, tags, and priorities
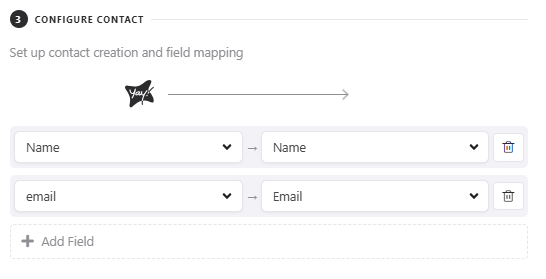
3. Map fields to create contacts
You can now map your form fields to the fields in your list in ChatFunnel to create contacts.
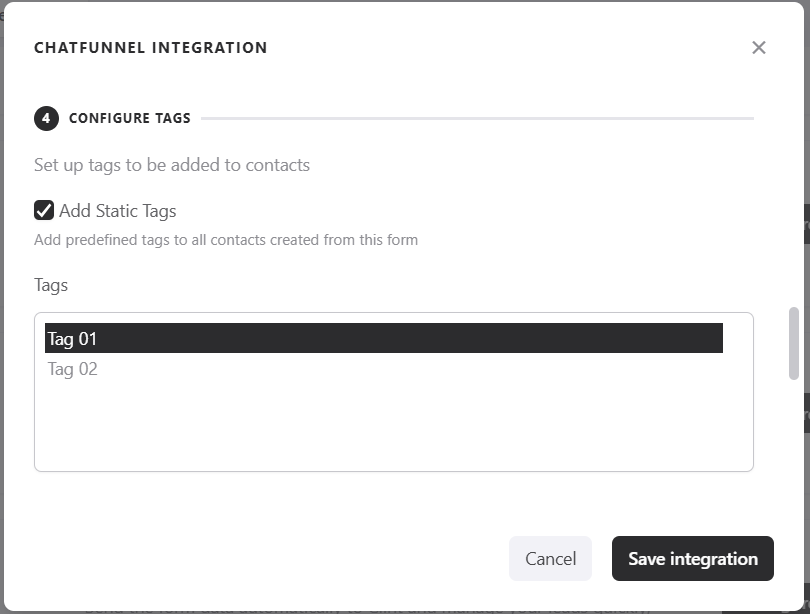
4. Add tags to responses
If you want, you can add tags to the submitted responses. To do this, just click Add static tags and select a tag.
5. Dynamic tags based on multiple choice
You can assign tags automatically based on the selections made in multiple-choice fields, as in the example below:
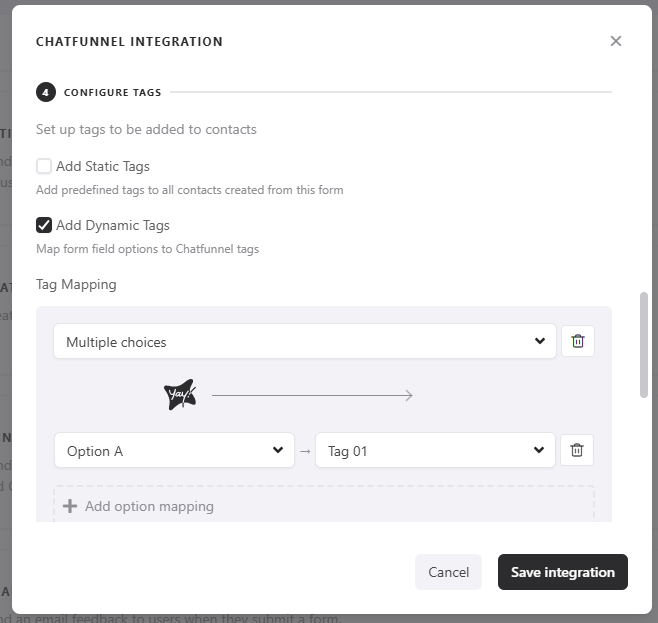
Note: To use this feature, you must have at least one tag registered in ChatFunnel and at least one multiple-choice field in your form.
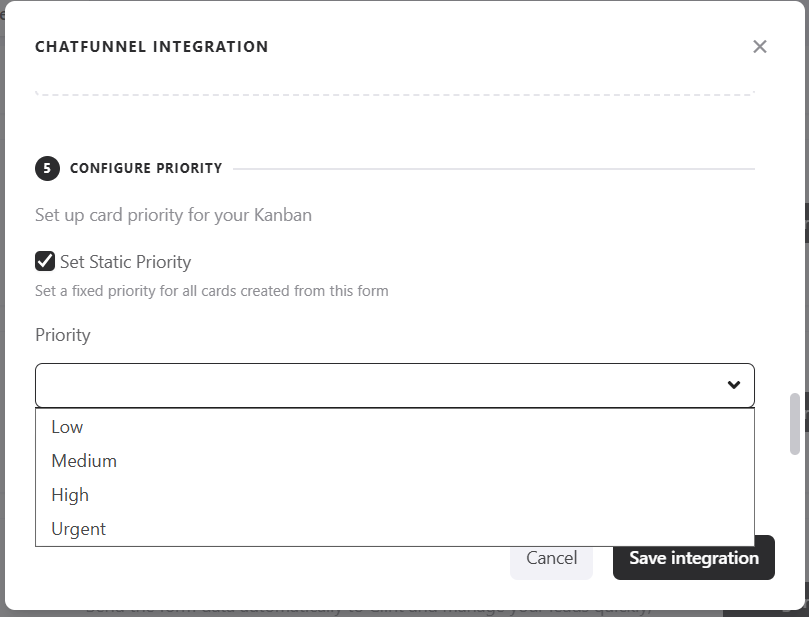
6. Add a static priority
If you want, you can add a static priority to your submission. To do this, just click Set static priority and select the desired priority.
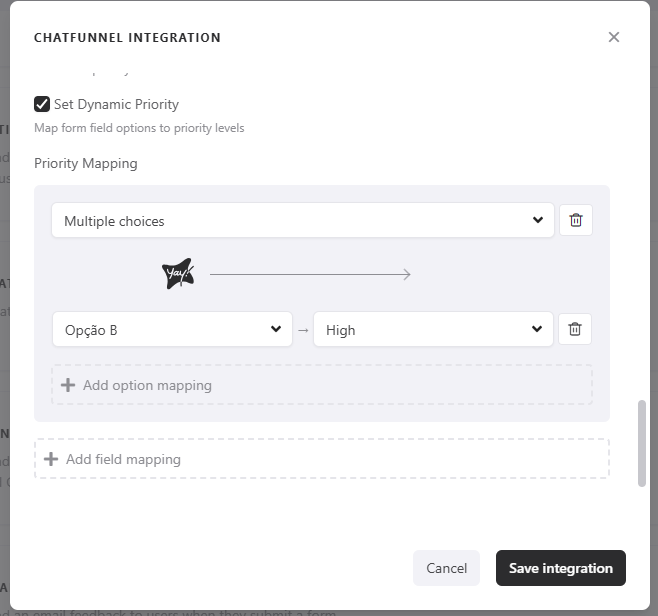
7. Dynamic priorities based on multiple choice
You can assign priorities automatically based on the selections made in multiple-choice fields, as in the example below:
Control when data is sent to ChatFunnel
8. Conditional sending based on responses
This feature lets you define conditions for sending data to ChatFunnel. That way, depending on the user's response, the information will be sent to the platform only if the defined condition is met.
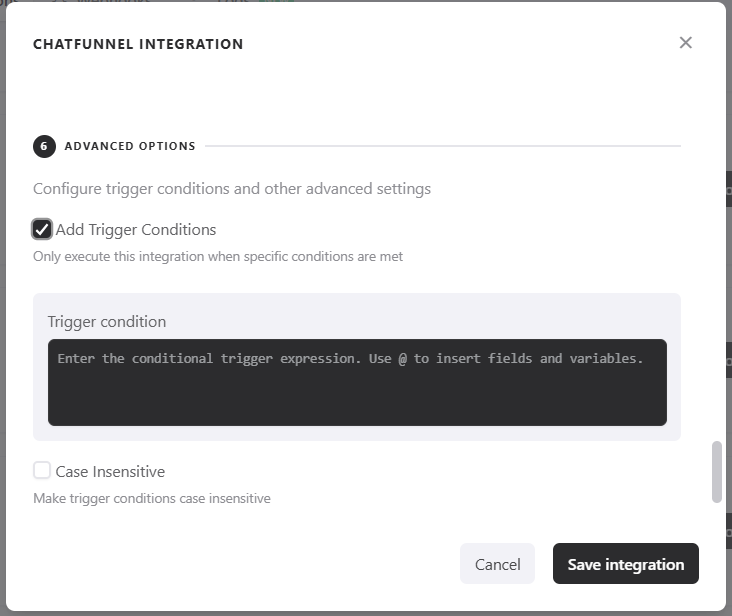
If you are interested in better understanding how our conditional system works, you can access our help article: Como Criar Expressões para Execução Condicional de Integrações.
Conclusion
You learned how to set up the ChatFunnel integration in Yay! Forms, connect your ChatFunnel account, choose where form data will be sent, map fields to create contacts, and enhance submissions with tags, priorities, and conditional sending based on responses.