This article will help you integrate Yay! Forms with Google Calendar, from enabling the integration in your form to connecting your Google account and finalizing the setup in Make.
Accessing the integration settings in Yay! Forms
Follow the steps below to integrate Yay! Forms with Google Calendar:
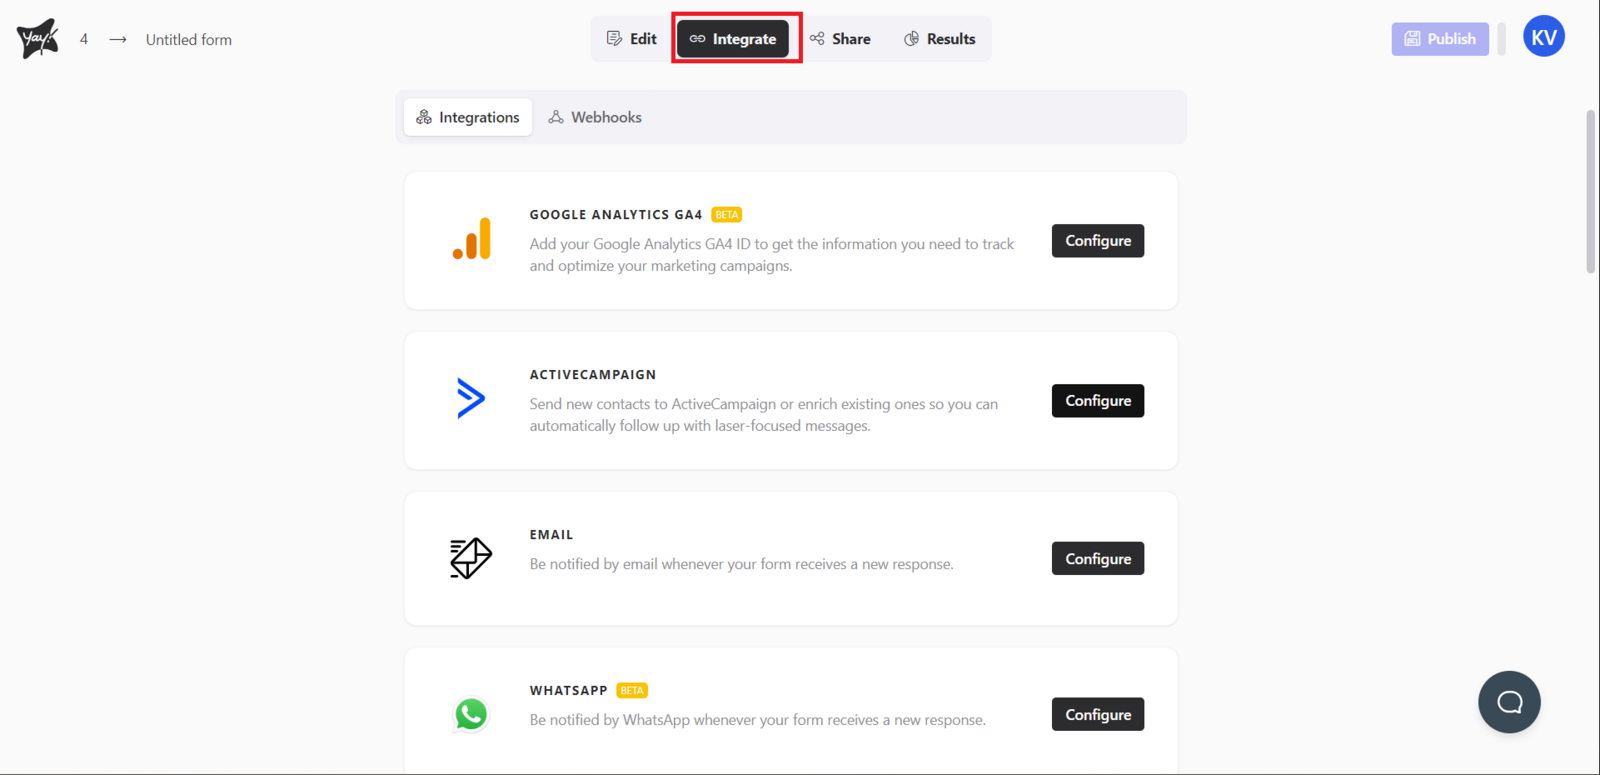
First, open the desired form and select the Integrate tab. At this point, you will find the Google Calendar option. Click Configure to proceed with the Google Calendar integration.
Setting up Make and connecting Yay! Forms
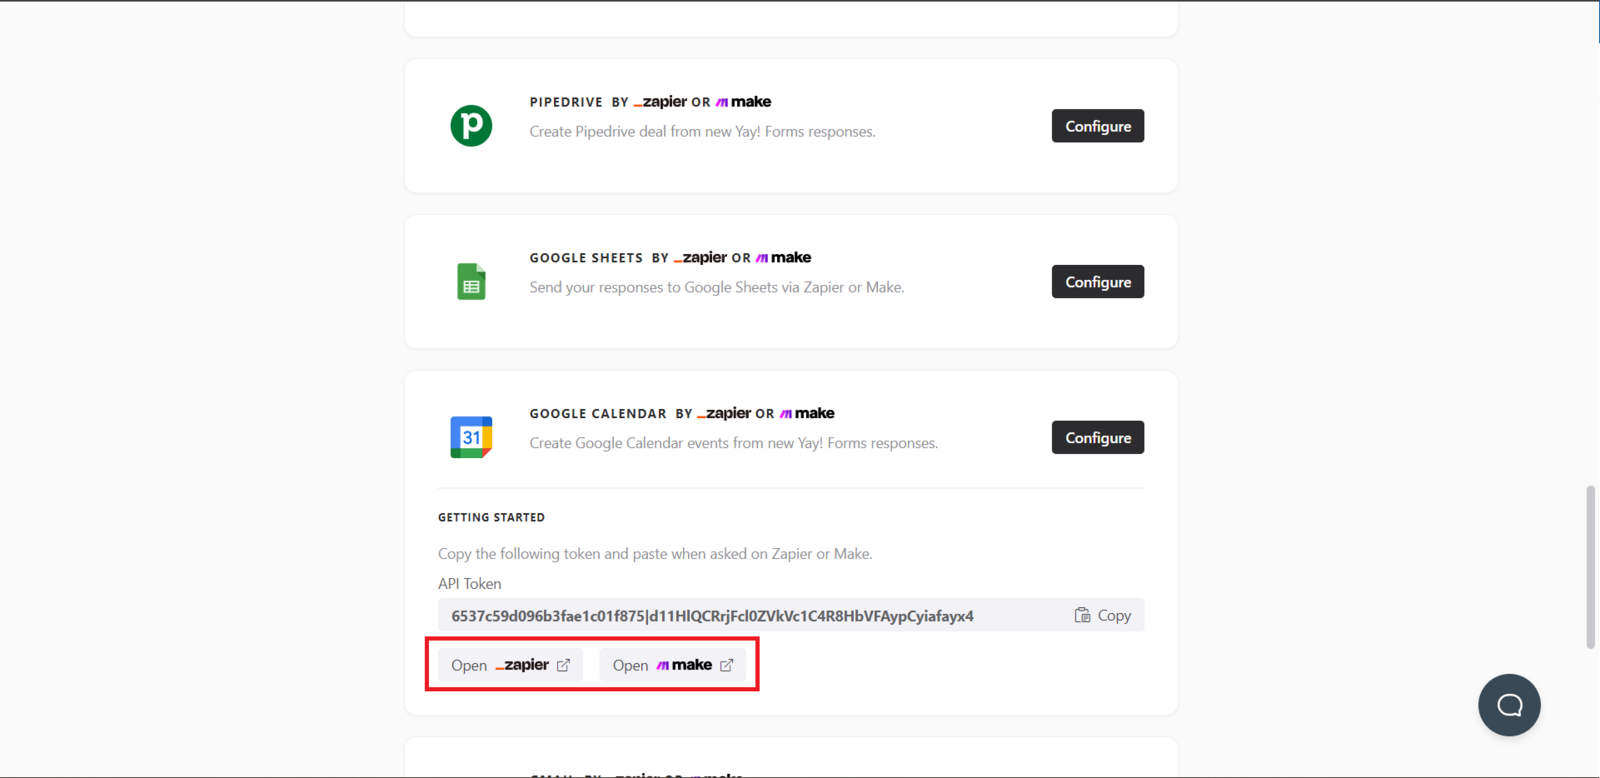
Now you need to open your Make account. After that, you must set up your Yay! Forms account in Make. To do this, follow this tutorial by clicking nesse link.
Configuring Google Calendar in Make
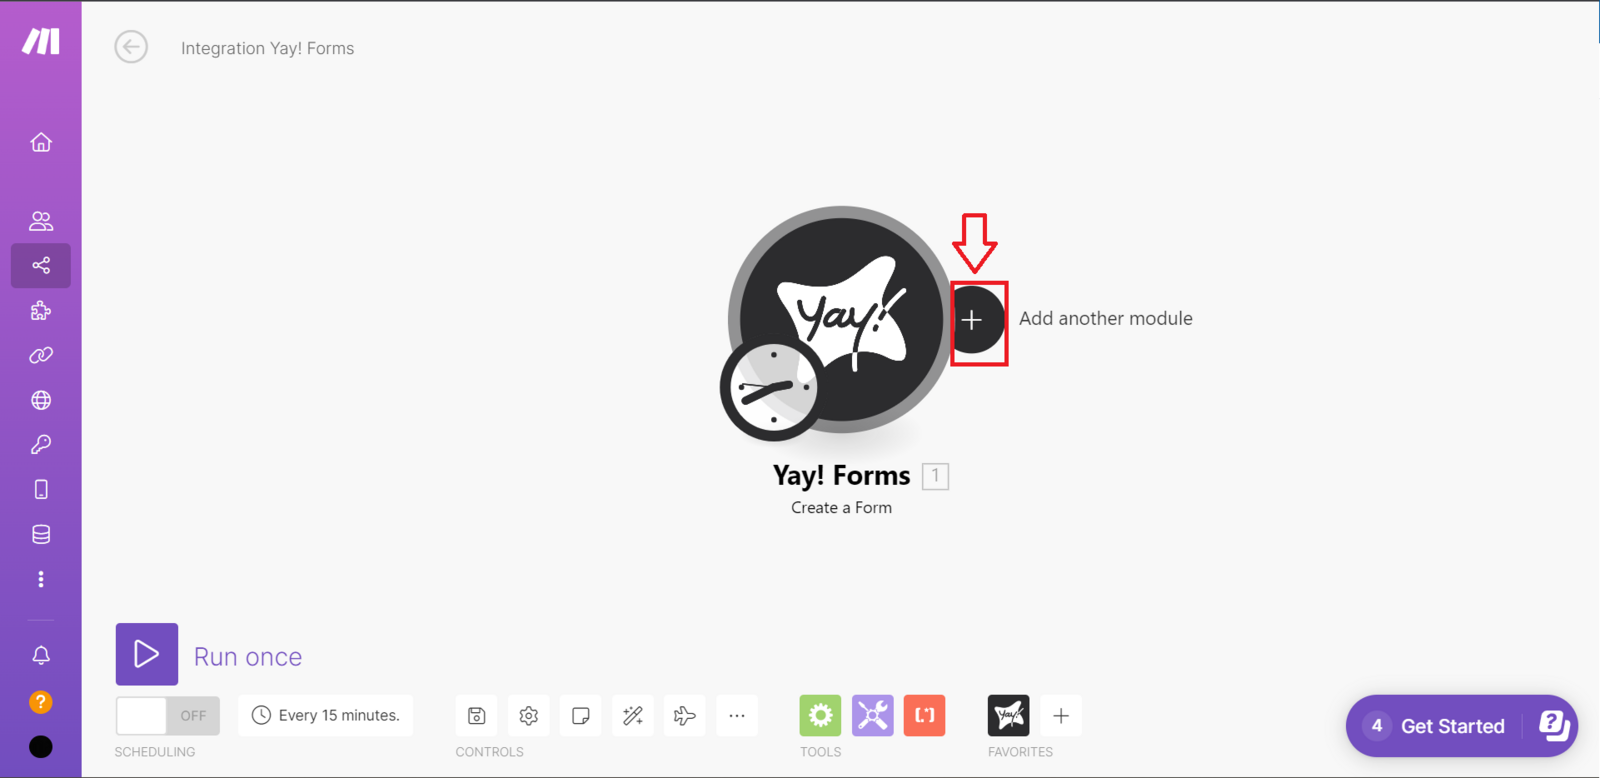
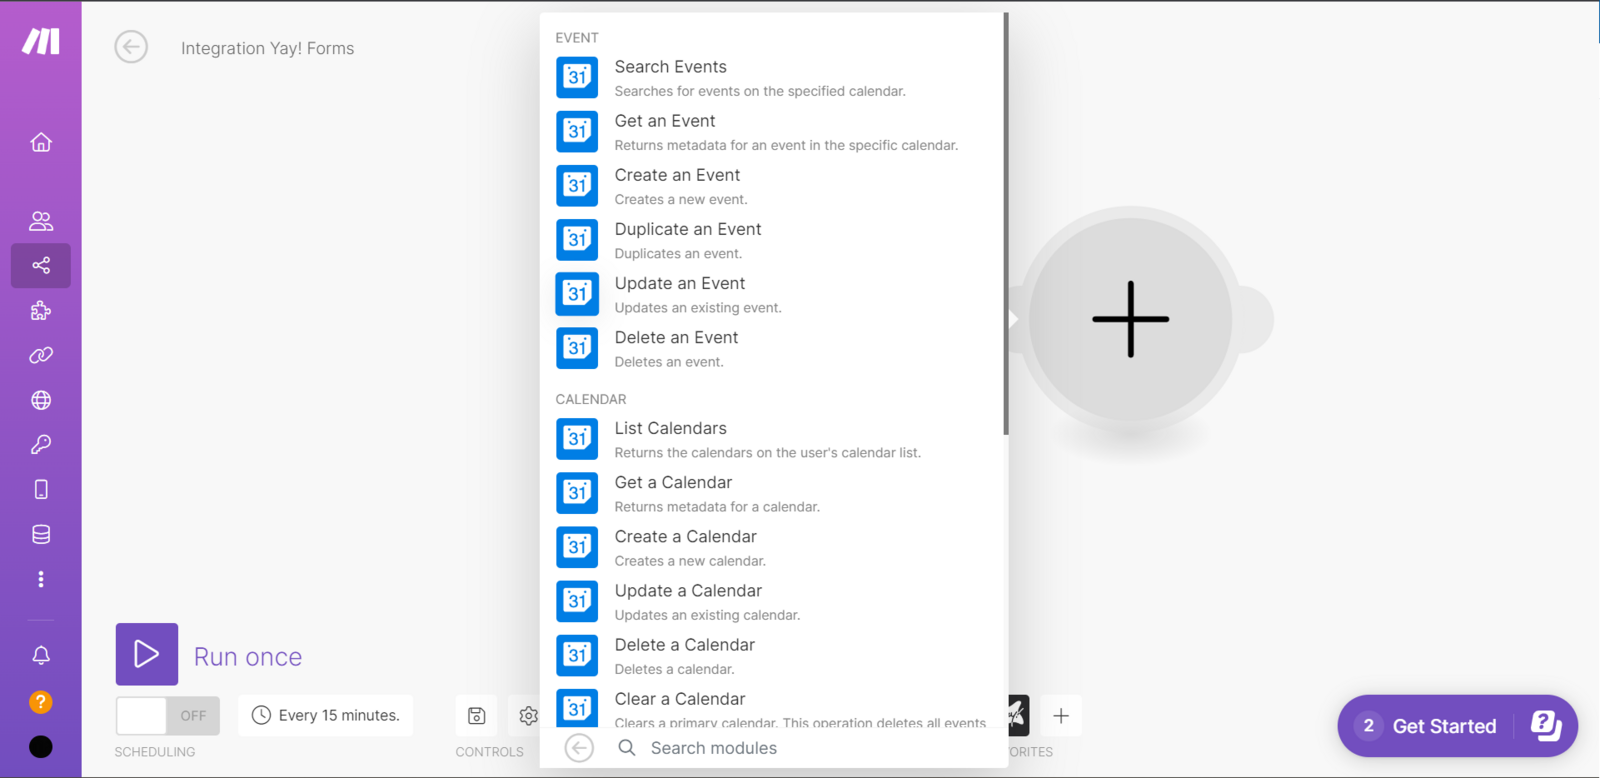
After setting up Yay! Forms, you will need to set up Google Calendar. To do this, click the button as shown below and search for Google Calendar. Then, you will need to choose the setup you prefer.
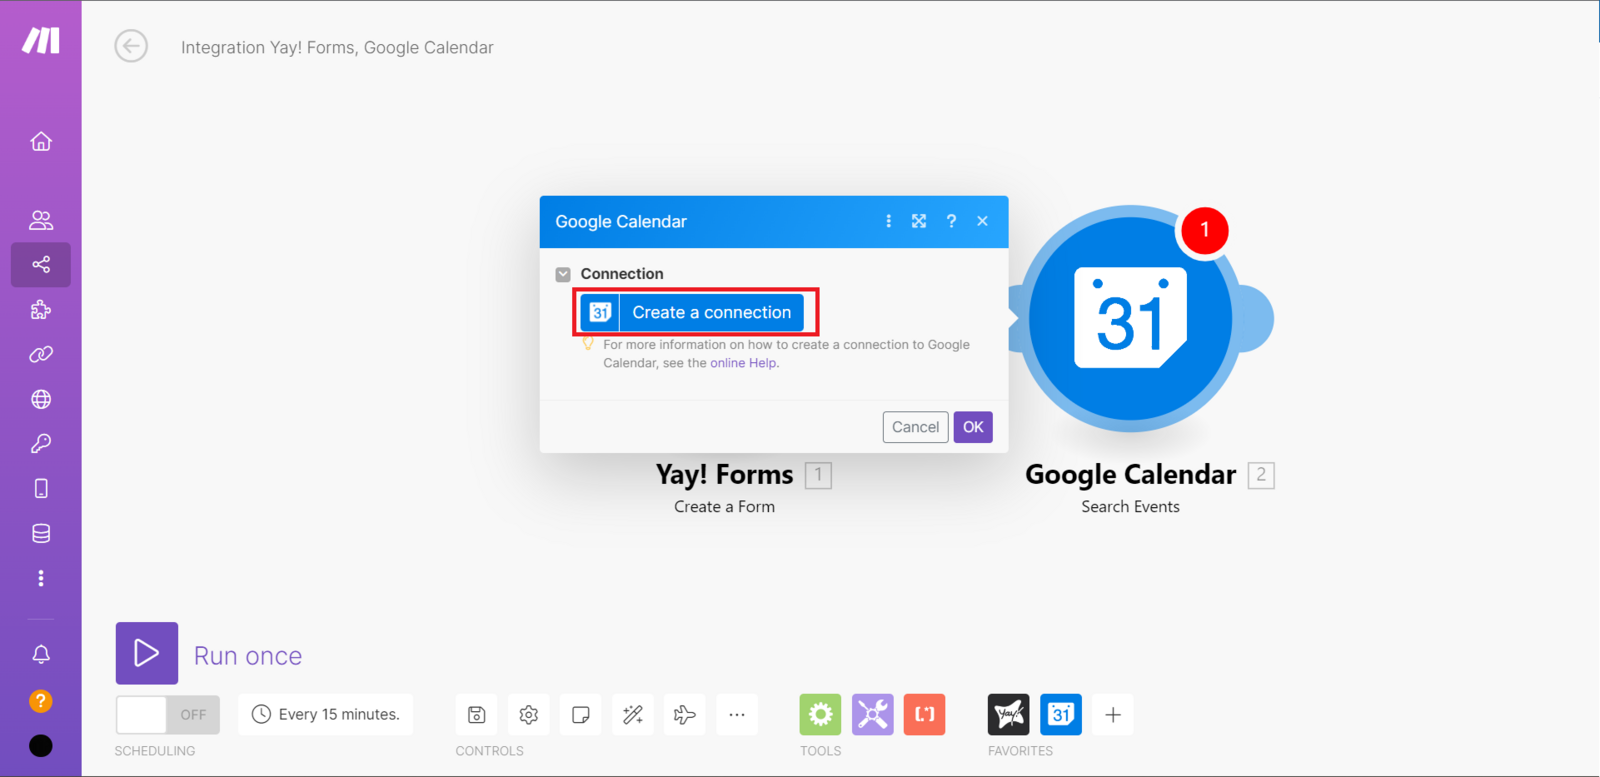
Then, right after that, you will need to click Create a connection, which will make a window appear to connect your Google account. Just connect and click Allow.
Now just finish the setup however you prefer, and your Google Calendar integration will be complete.
Support and feedback
We hope you enjoy the new integration :)
If you have any questions or suggestions, send an email to [email protected].
Conclusion
You now know where to enable the Google Calendar integration in Yay! Forms, how to connect Yay! Forms and Google Calendar through Make, and where to find additional help via the video and support email.