This article will help you connect a Yay! Forms form to Google Sheets, so form responses can be sent to a spreadsheet. You’ll learn where to find the integration in the form builder, how to choose a Google account, and how to create a new spreadsheet or link an existing one.
Set up the Google Sheets integration
- Log in to your Yay! Forms account and create or edit an existing form.
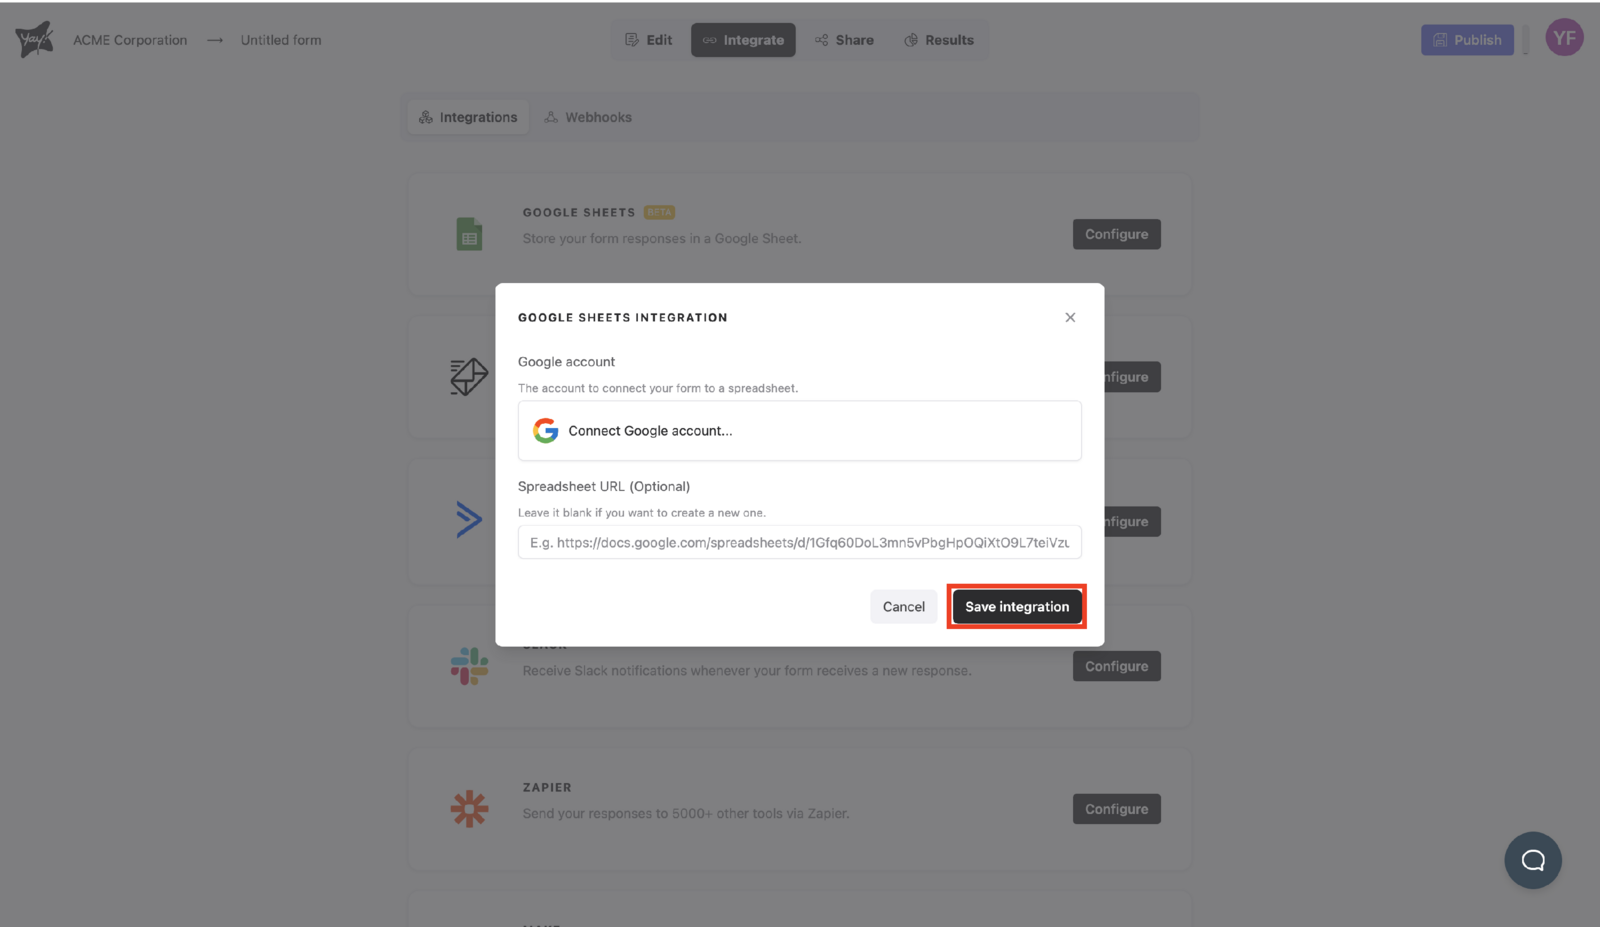
- In the form builder, click Integrate at the top of the screen.
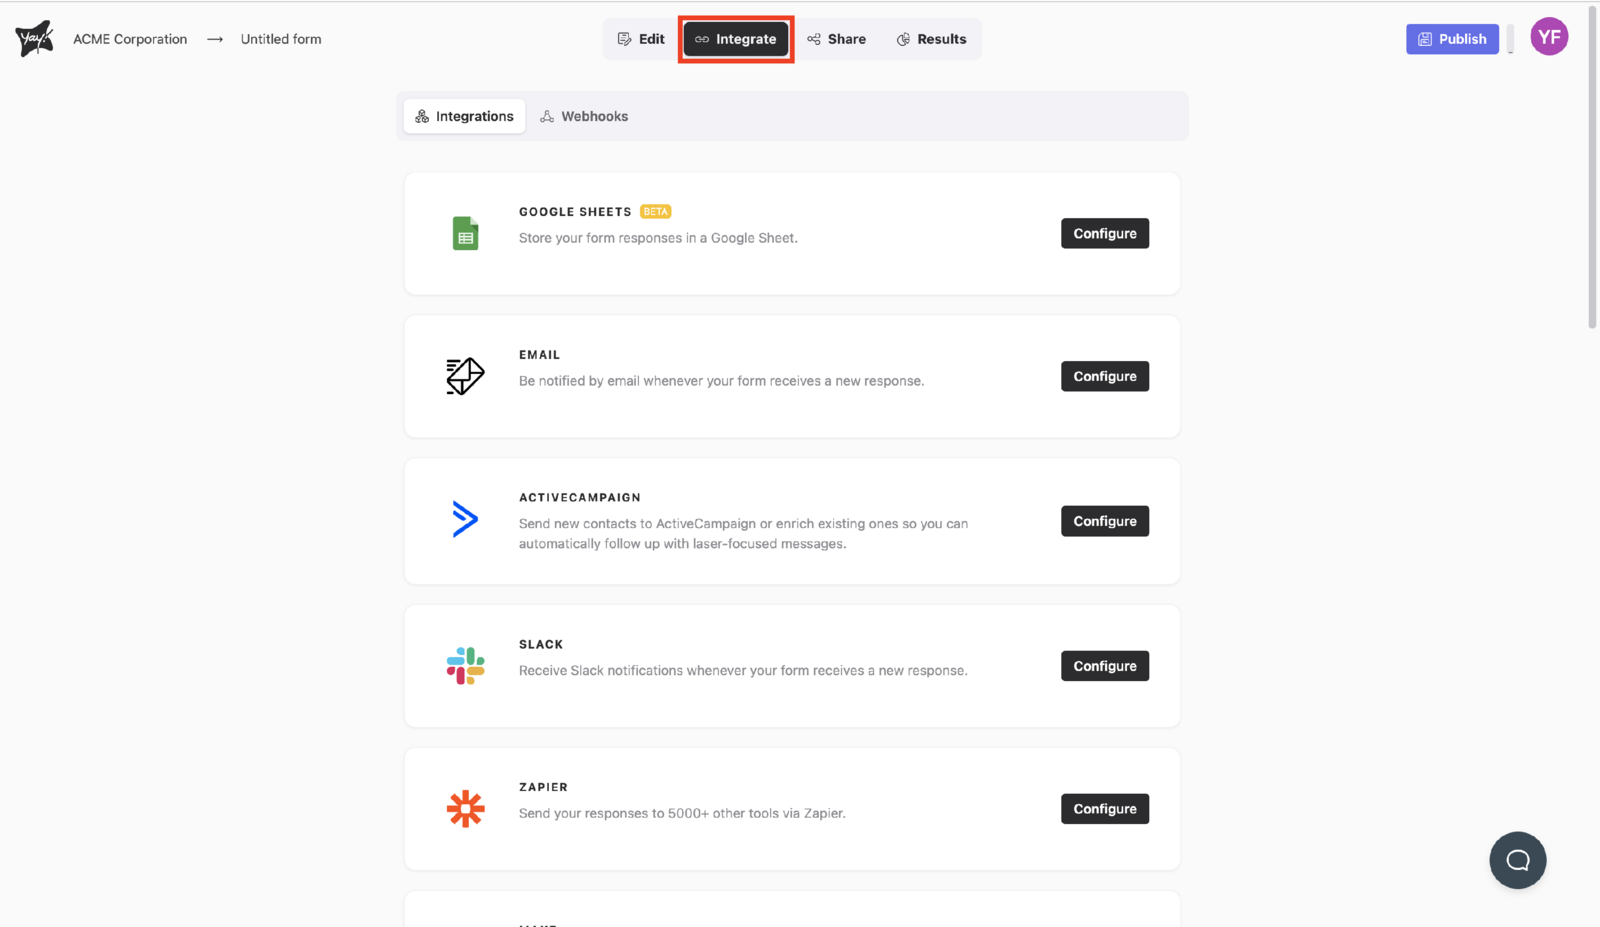
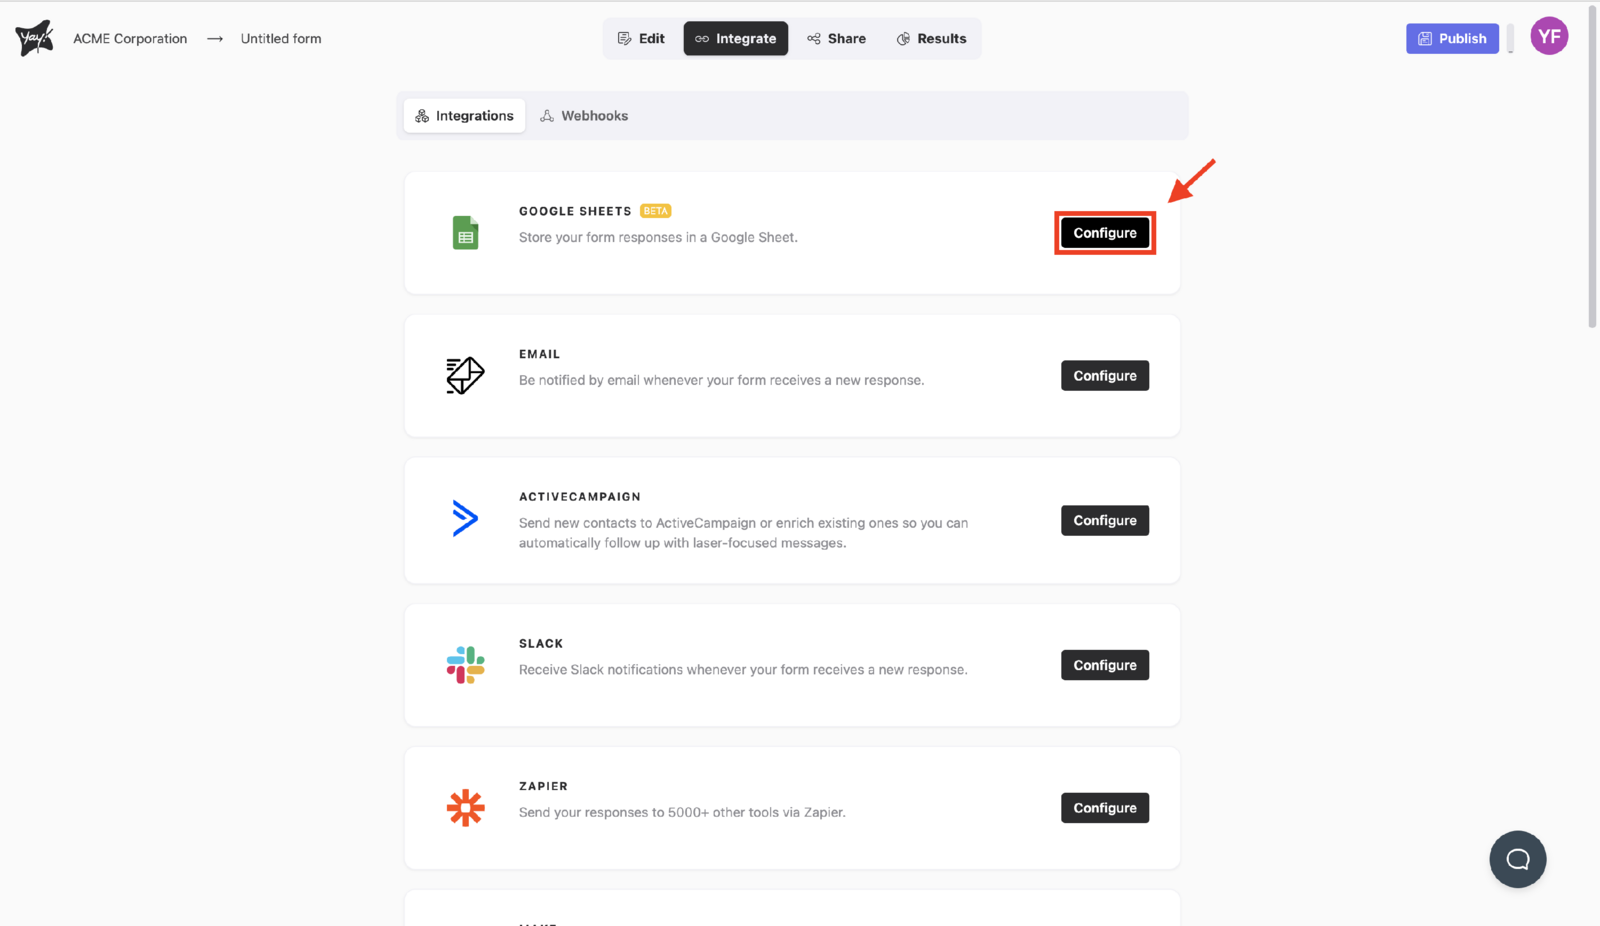
- Find Google Sheets and click Set up.
- Choose the Google account you want to associate in Workspace.
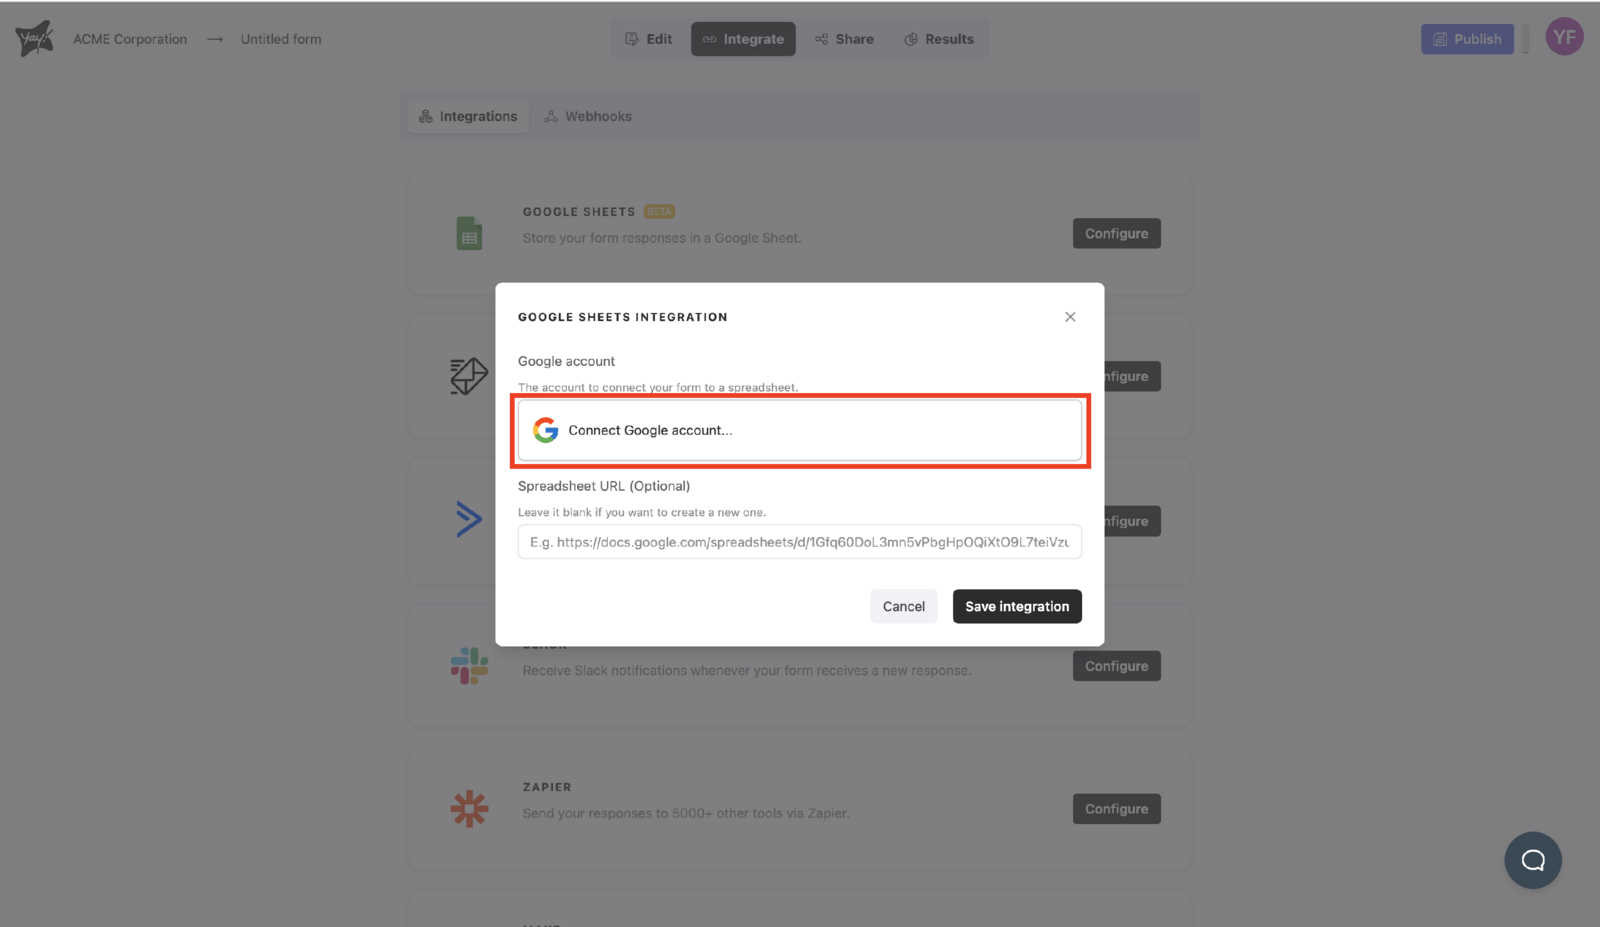
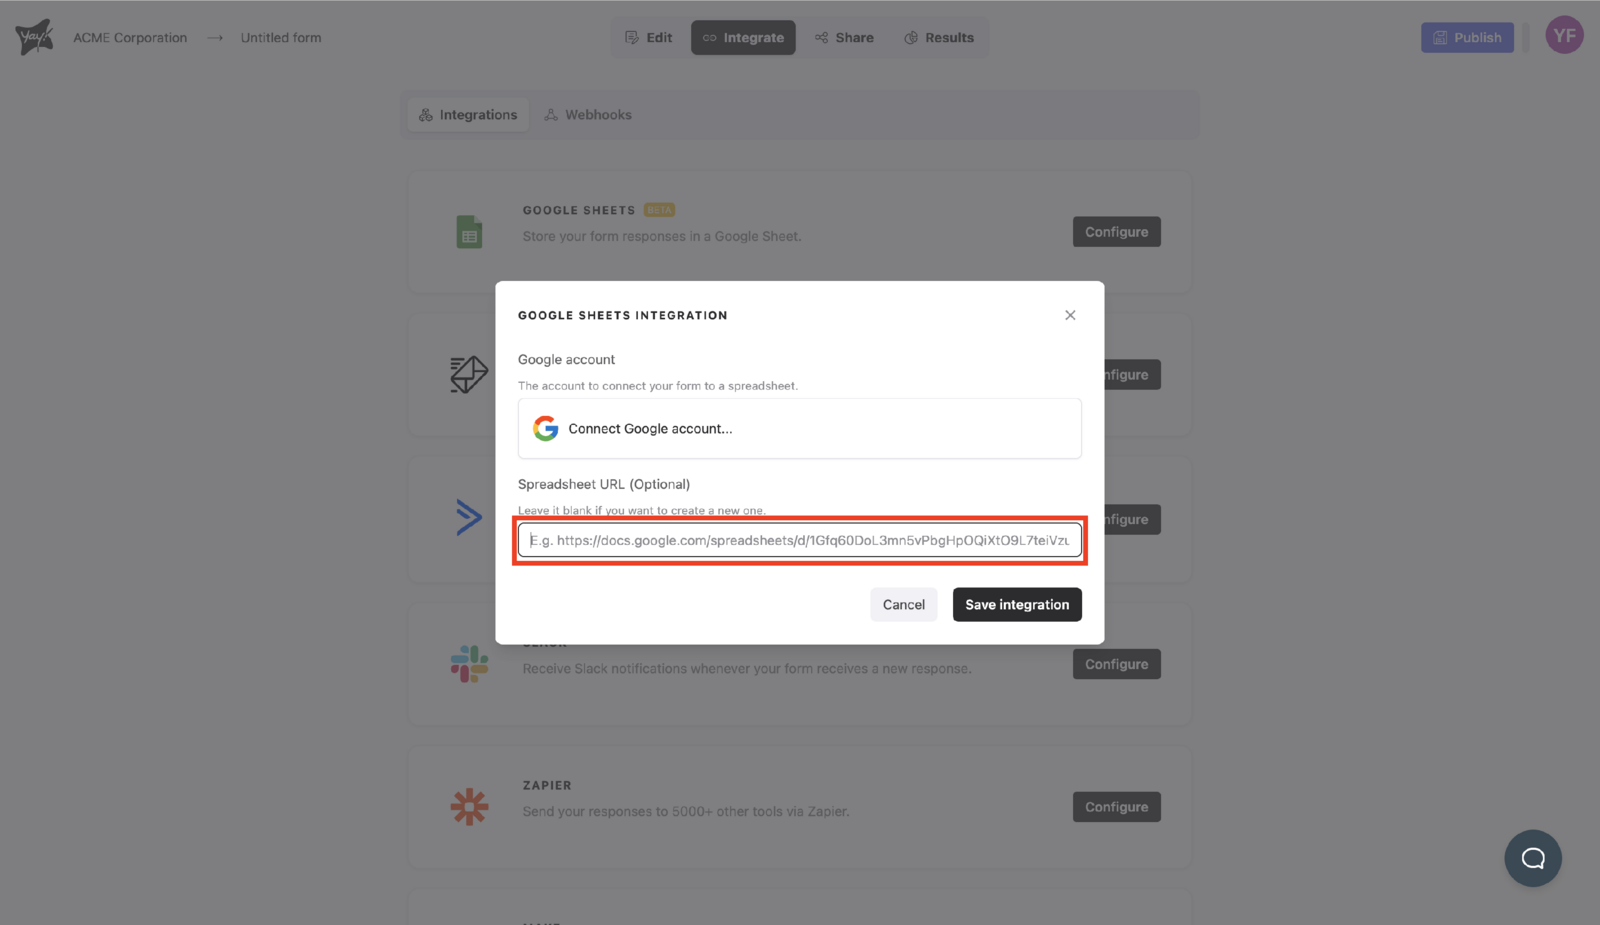
- Click Save integration to create a new spreadsheet, or paste the URL of an existing spreadsheet.
Manage the integration
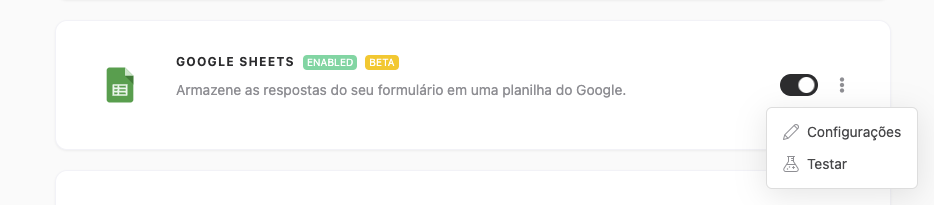
After setting up your integration, you can easily enable or disable it by clicking the button below. You can also adjust the settings or test it by clicking the three dots.
Important notes
-
Fill out the form
For the test to be sent correctly, the form must have at least one valid response completed. -
Data sending
The test will send the data from the last valid response submitted. -
Send status
Please note that the test does not mark the response as sent in the integration being tested. This is only a procedure to verify the integration.
Support
If you have any questions or suggestions, send an email to [email protected].
Conclusion
You now have a structured path to connect Yay! Forms to Google Sheets, select the correct Google account, and manage the integration settings, including enabling/disabling and testing the connection.