This article will help you configure the SellFlux integration by creating and setting up a custom webhook, mapping your form question IDs (name, email, and phone), and connecting the webhook link between SellFlux and Yay Forms.
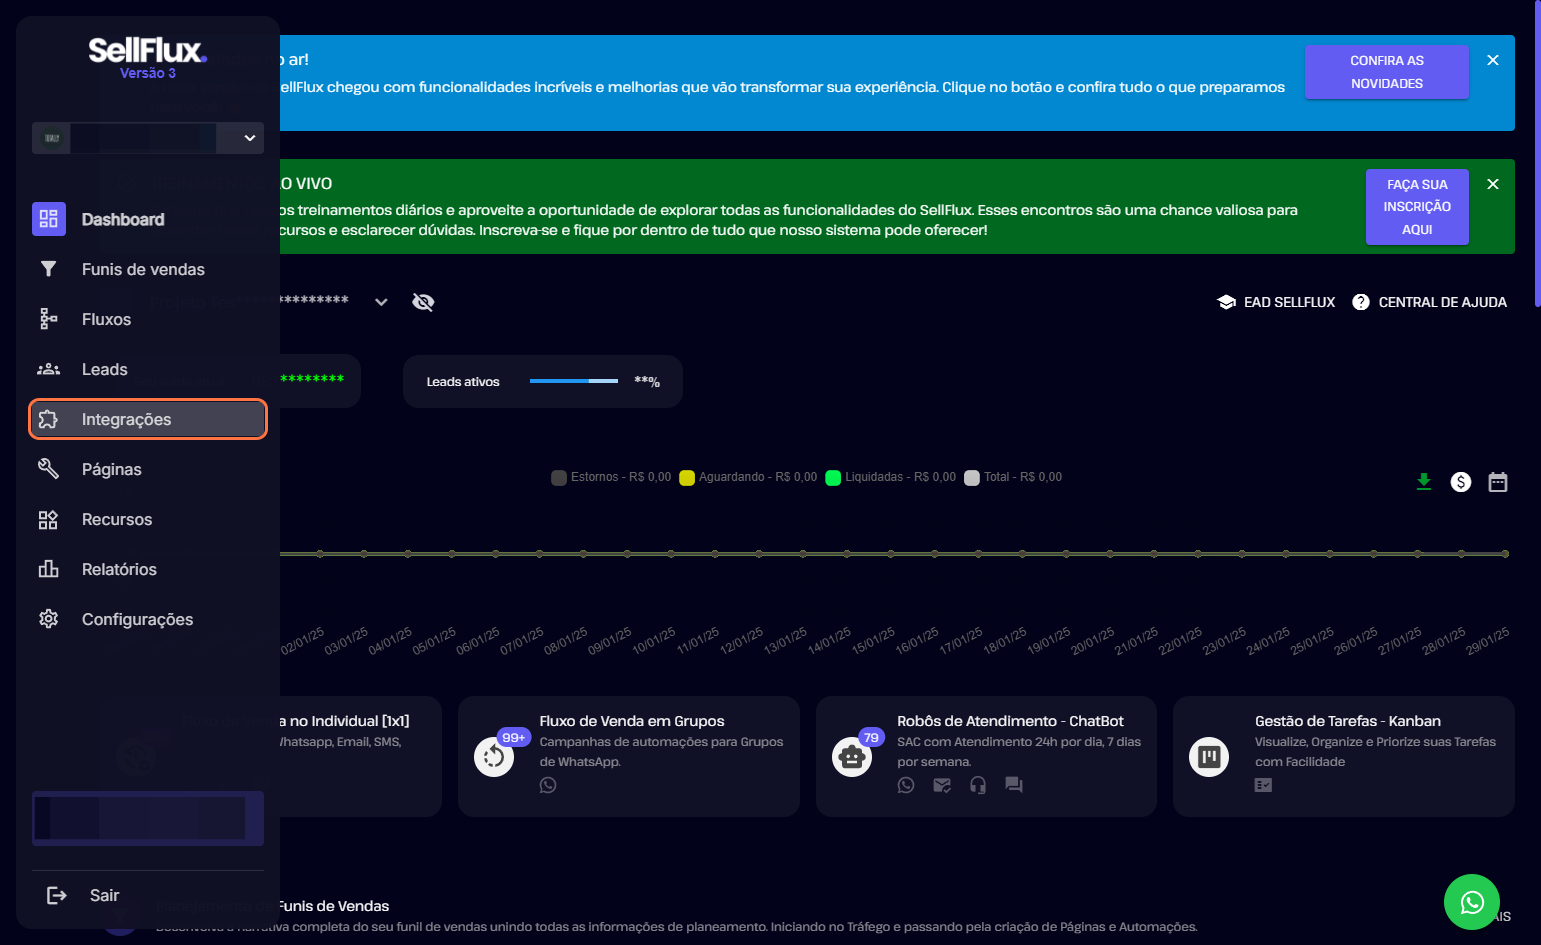
Accessing integrations in SellFlux
- Access the Integrations tab inside Sellflux, which by default will open the webhook section.
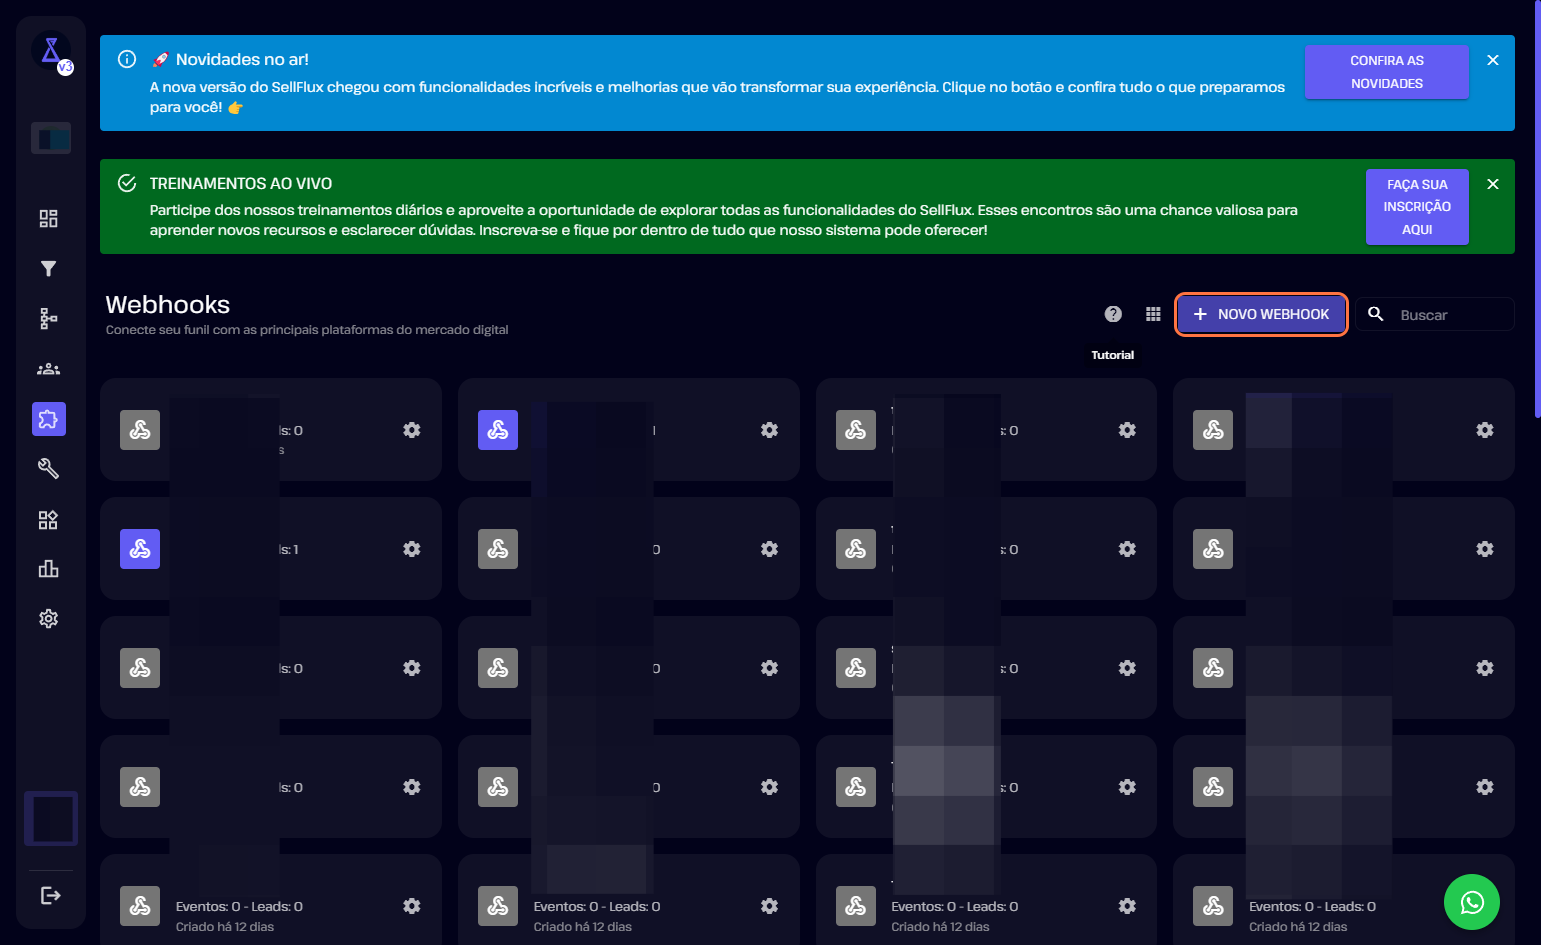
Creating a new webhook
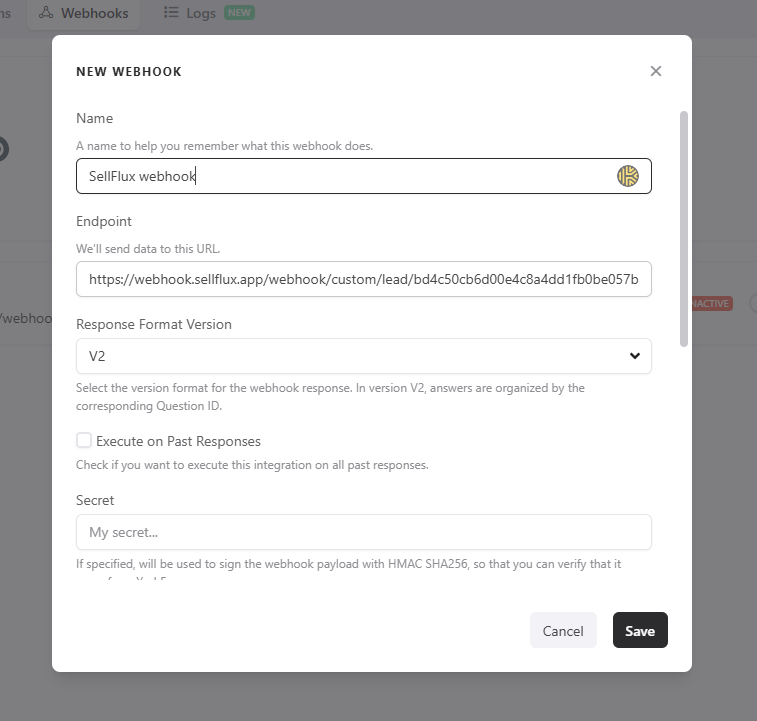
- Click New Webhook to create a new webhook.
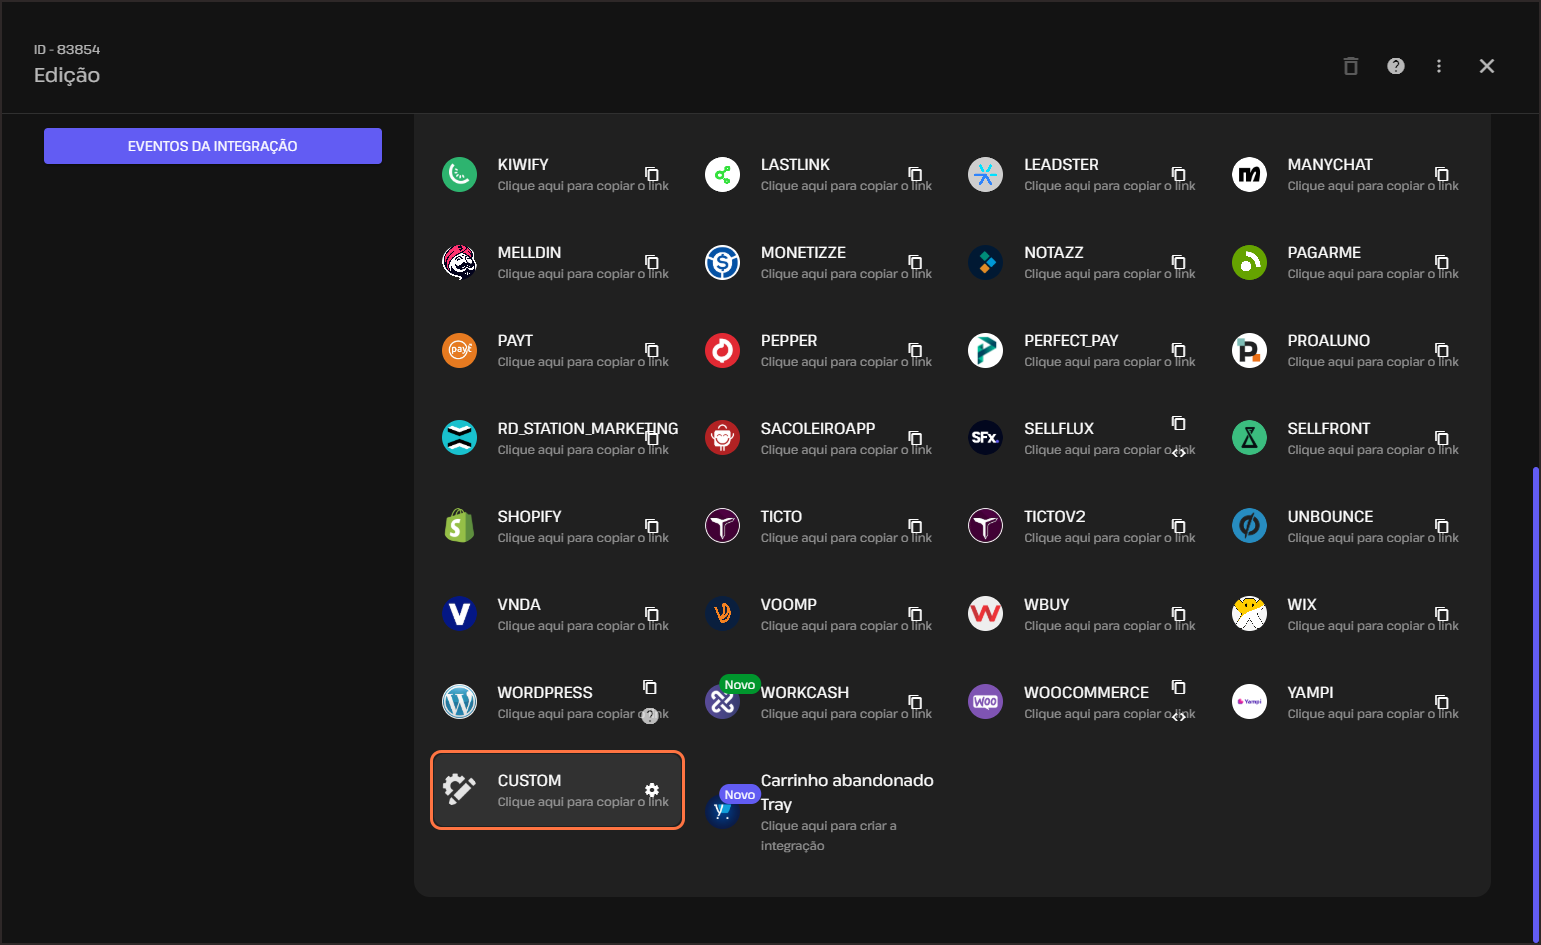
After creating it, select the created webhook and select the Custom option.
Getting form question IDs (name, email, and phone)
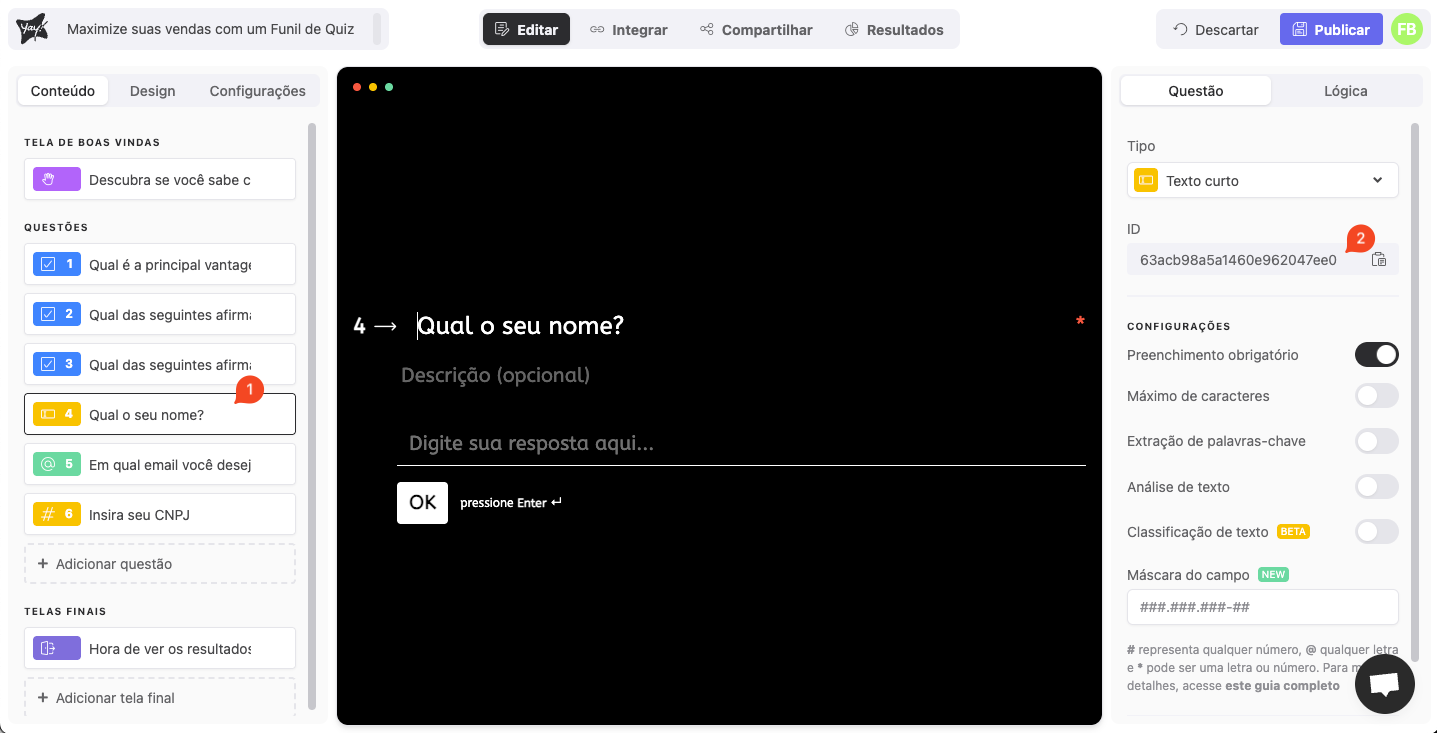
In your form, copy the ID of the questions related to name, email, and phone. To find the question ID, click the question and get the ID from the right panel where its details are shown, as in the image below.
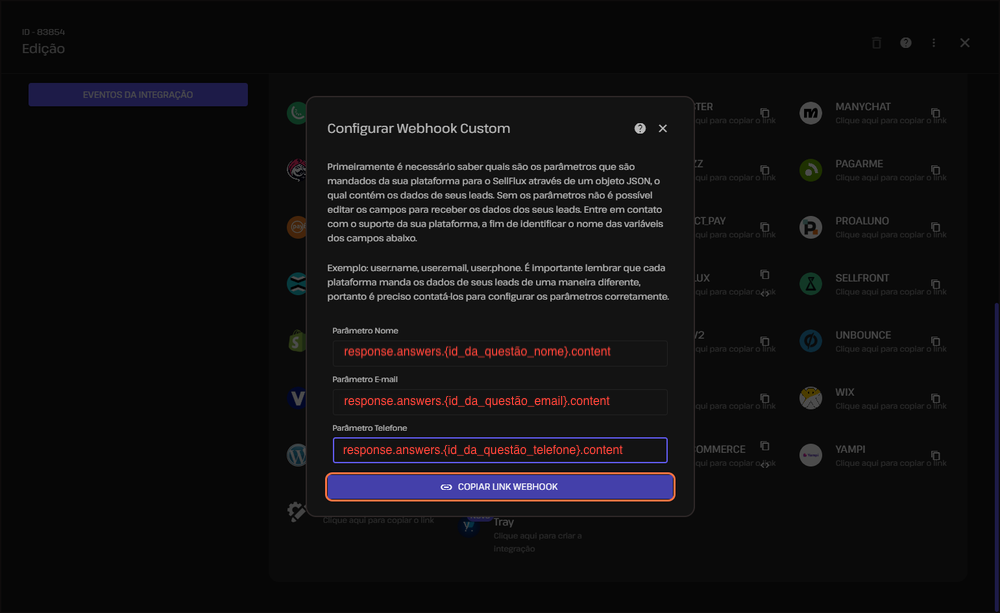
Filling the fields with the correct IDs
With the question IDs for name, email, and phone in hand, fill in the respective fields as shown in the image below, replacing the value {id_da_questão...} with the ID of each question.
For example: If the ID of your name question is "63acb98a5a1460e962047ee0", the value you should enter in that field (on the next screen) would be
response.answers.63acb98a5a1460e962047ee0.content.
Connecting the webhook link in Yay Forms
Copy the webhook link provided by the platform and paste it into your new webhook inside Yay Forms, as shown in the images below. If you need more information about the webhook, see our support article available by clicking aqui.
Final confirmation
Done! You have just configured SellFlux. 🤜🤛
Support
If you have any questions or suggestions, send an email to [email protected].
Conclusion
You now have the SellFlux webhook created and set to Custom, your form’s name/email/phone question IDs mapped into the correct fields, and the webhook link connected in Yay Forms so submissions can be sent properly.